Key Management
Use FirstLook to distribute game keys to players across all major platforms — including Steam, Epic Games Store, PlayStation, and Xbox — and for various purposes. When you upload keys to FirstLook, they are automatically assigned to players after they complete the onboarding process. This ensures that only verified, onboarded players receive access to your build. In the ‘Keys & Access’ tab, you can view all keys for your game, check which ones are redeemed, or search for a specific key.
For the end-to-end task walkthrough, see Getting Players Into Your Game.
Adding Keys
Section titled “Adding Keys”This section walks through the process for Steam keys in particular, however other platforms offer similar experiences.
Adding Steam Keys
Section titled “Adding Steam Keys”If this is your first time distributing Steam keys for testing, we recommend reading the Steam Keys and Playtest Guide for background on how key distribution works and how to request them on Steam.
Requesting Steam Keys
Section titled “Requesting Steam Keys”You can generate Steam keys in the Steamworks Partner Portal. You need Generate Steam Keys permissions within Steam to do so.
-
Log in to the Steamworks Partner Portal
Visit the Steamworks Partner Portal and log in with your developer account. -
Select your App
Find your game in the list of apps and open it. If you’re using a dedicated Playtest App, select that version instead. -
Request Product Keys
Click the Request Steam Product Keys button.
Enter the number of keys you want (1,000 is a good starting point) and select the key type:- Standard Key for playtests
- Release State Override Key if not using a Playtest App
-
Download the Keys
Once generated, download the.zipfile. Inside, you will find a plain text file with one key per line. -
Upload the Keys to FirstLook
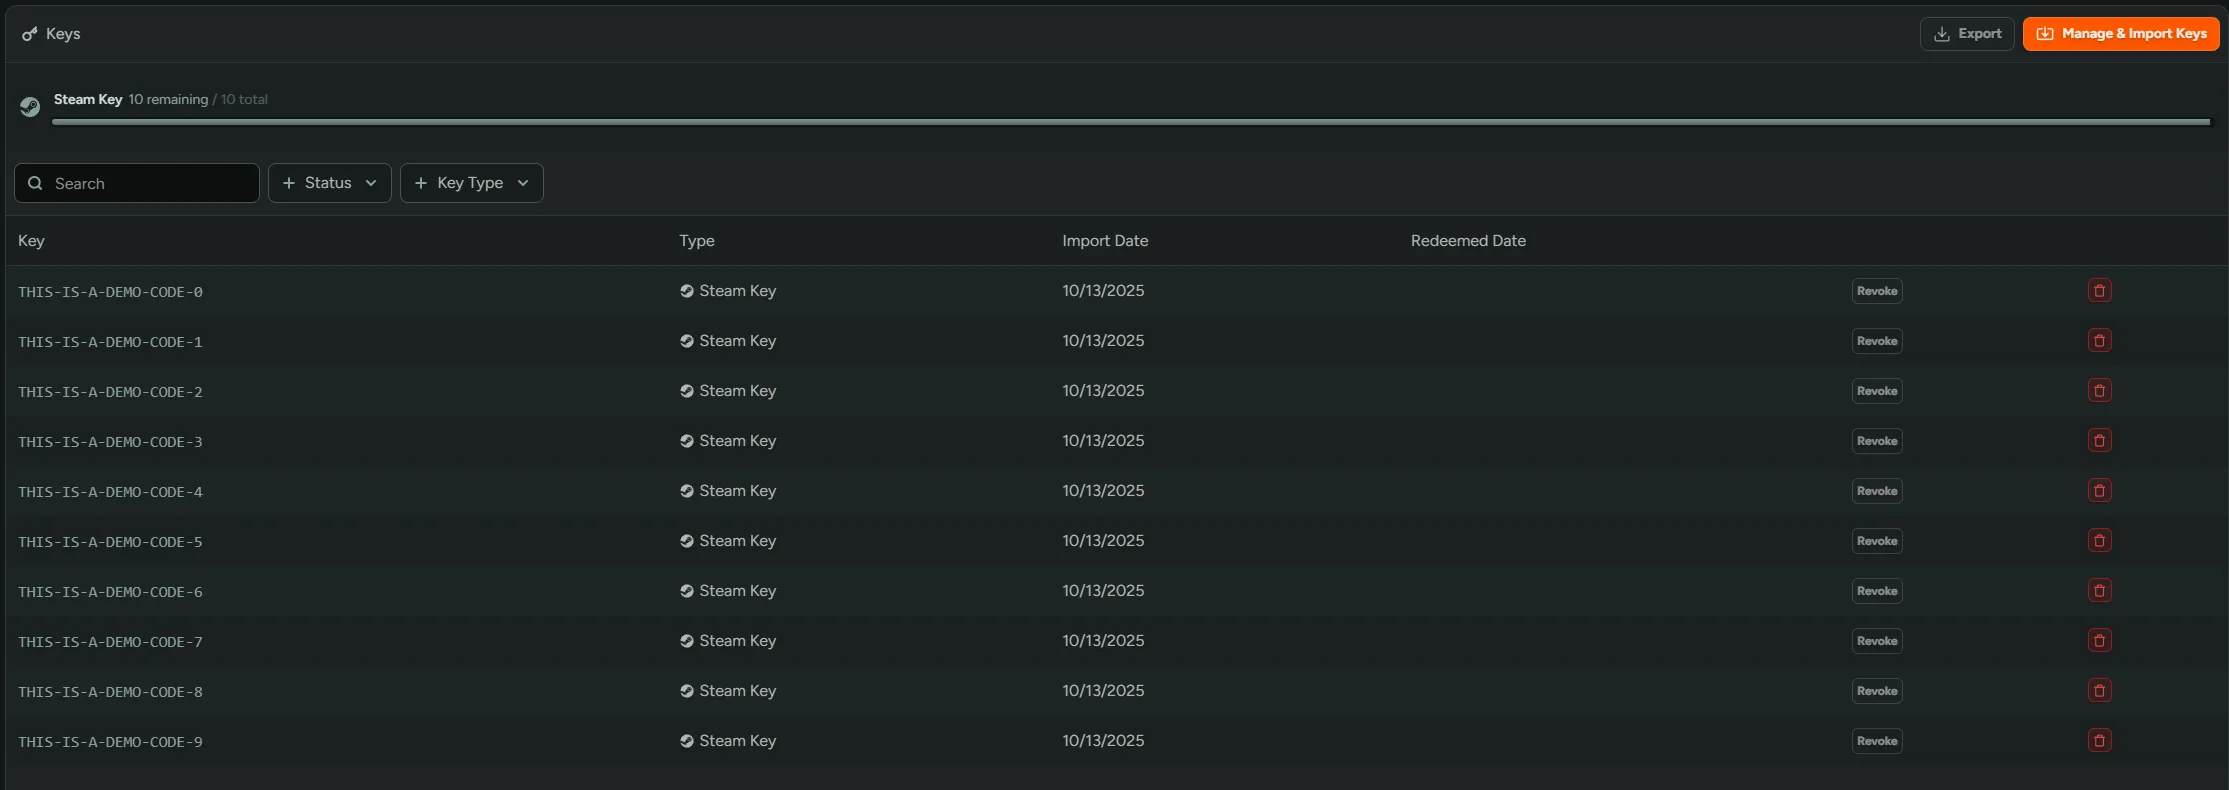
Open your FirstLook Dashboard → Keys. You will notice some placeholder Demo Keys, which will be removed once you add your own.- Click Manage & Import Keys, then choose the Steam Key row.
- Click Choose File to upload your
.txtfile - Or paste the keys directly into the input field
- Click Import to complete the upload.
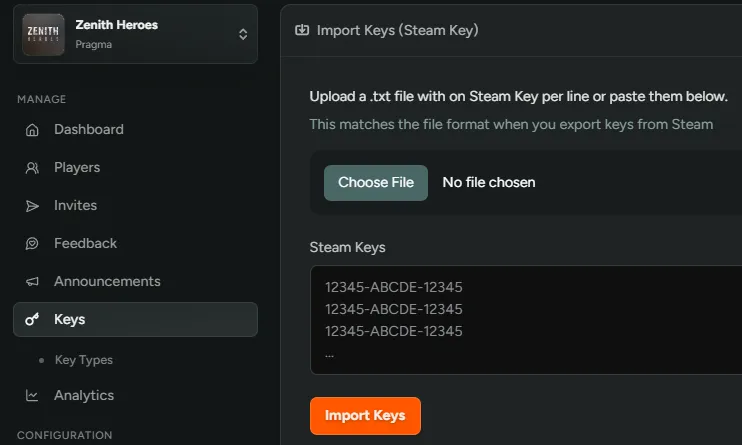
-
Done!
Your Steam keys are now uploaded. You can add more keys or remove them at any time.Players who sign up for your playtest will automatically receive a key once invited or approved.
Key Types
Section titled “Key Types”To differentiate between the various keys in your system, we use Key Types. Key Types group keys by their purpose and platform, allowing you to configure different settings for each type and assign specific keys to targeted audiences.
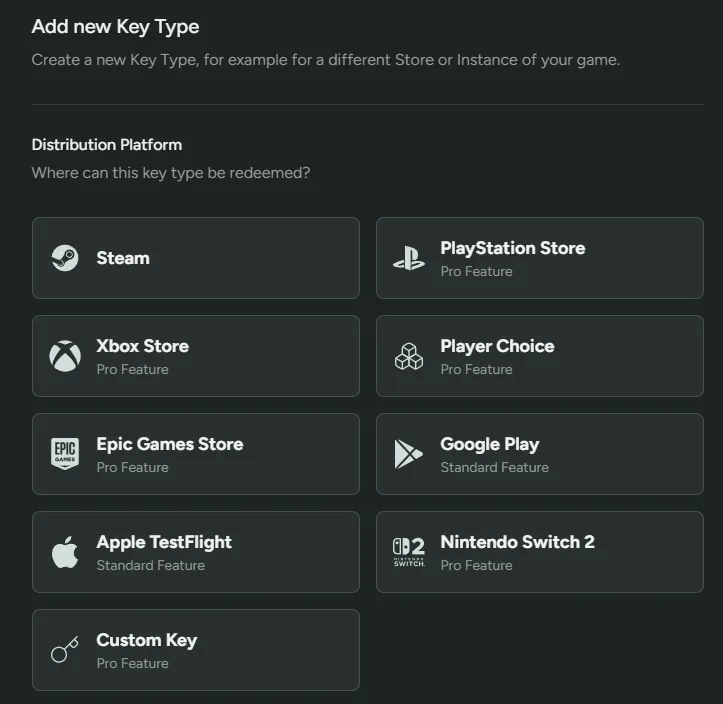
Key Type Configuration
Section titled “Key Type Configuration”Next you can configure the following settings:
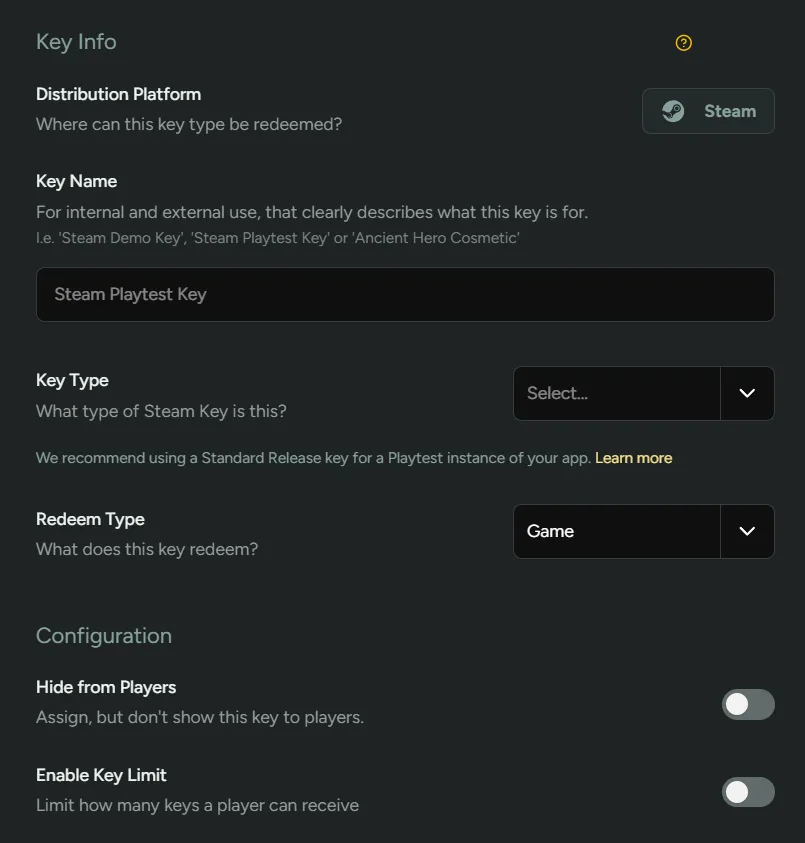
Steam
Distribution Platform– The platform on which the key is distributed.Key Name– The name of the key type. This identifies the key type in your system and is displayed to players in their dashboard.Key Type– Select the type of key you exported - Playtest Standard Key, Default Release Steam Key, Release State Override Key, Developer Autogrant Key, Steam Inventory Item.Redeem Type– The type of product or content the key unlocks (Game, DLC or Bundle)Hide from Players- Toggle to hide the key from a players dashboard, but keep it assigned.Enable Key Limit- Set the maximum numbers of keys a player can receive.Item Definition ID- The ID of the item to be added to the player’s inventory. This is only available for Steam Inventory Item.Notify Player- Toggle to notify the player that they have received an item. This is only available for Steam Inventory Item.Trade Restriction- Set the trade restriction for the item. This is only available for Steam Inventory Item.
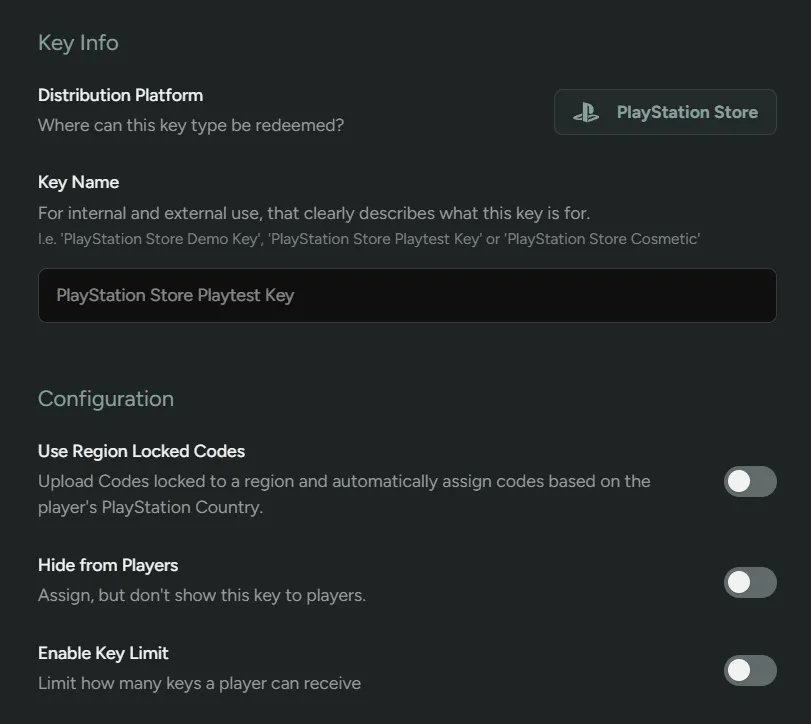
PlayStation Store
Distribution Platform– The platform on which the key is distributed.Key Name– The name of the key type. This identifies the key type in your system and is displayed to players in their dashboard.Use Region Locked Codes- Lock codes to a specific region and automatically assign them based on the players PlayStation Country.Hide from Players- Toggle to hide the key from a players dashboard, but keep it assigned.Enable Key Limit- Set the maximum numbers of keys a player can receive.
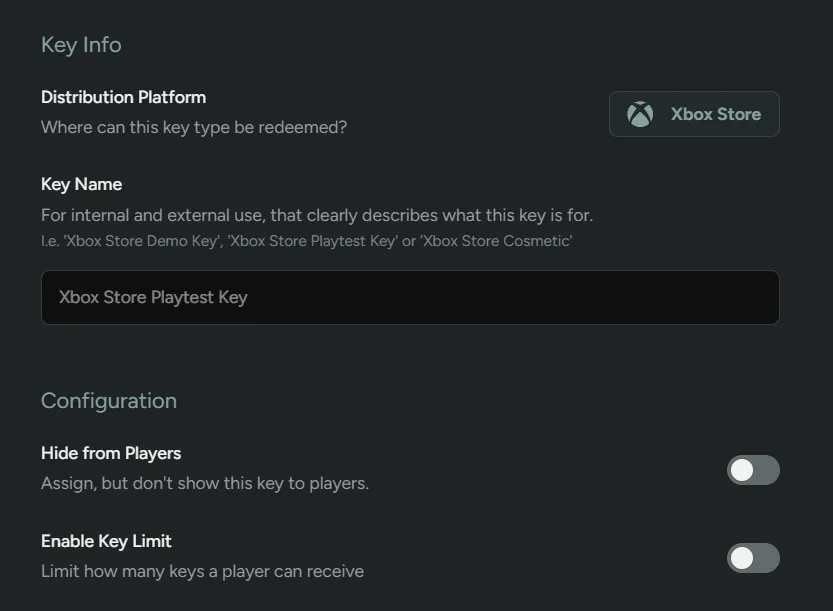
Xbox Store
Distribution Platform– The platform on which the key is distributed.Key Name– The name of the key type. This identifies the key type in your system and is displayed to players in their dashboard.Hide from Players- Toggle to hide the key from a players dashboard, but keep it assigned.Enable Key Limit- Set the maximum numbers of keys a player can receive.
Player Choice
Token Label- The name of the key type. This identifies the key type in your system and is displayed to players in their dashboard.Cross-Platform Keys- Cross-Platform lets players pick from supported store platforms (Steam, Xbox, PSN…)Custom- Custom lets you offer any selection of key types, e.g. one of several in-game skins.
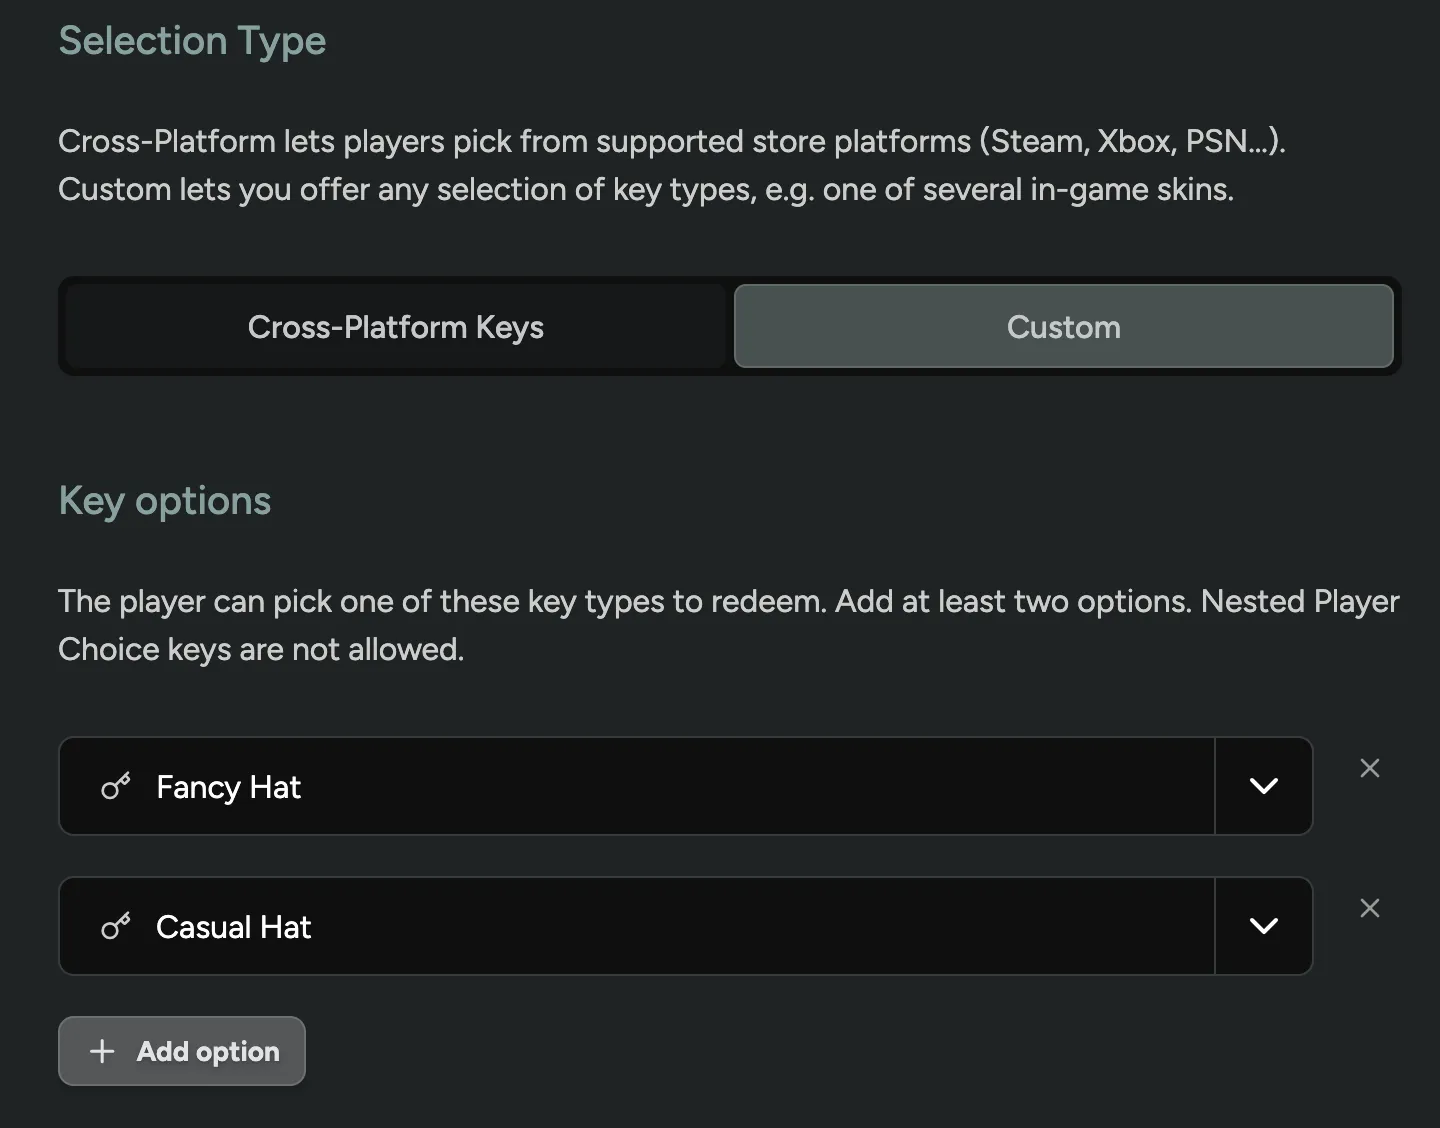
See Player Choice Keys below for the full setup and player experience.
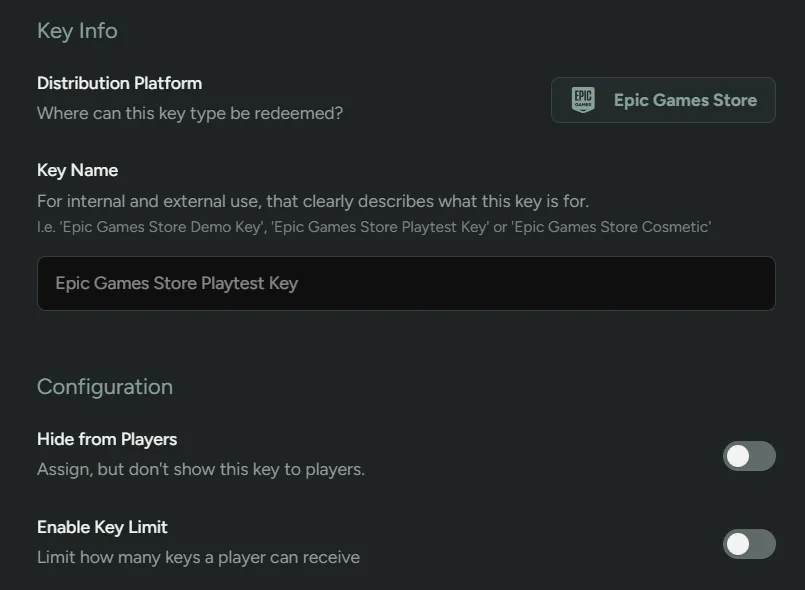
Epic Games Store
Distribution Platform– The platform on which the key is distributed.Key Name– The name of the key type. This identifies the key type in your system and is displayed to players in their dashboard.Hide from Players- Toggle to hide the key from a players dashboard, but keep it assigned.Enable Key Limit- Set the maximum numbers of keys a player can receive.
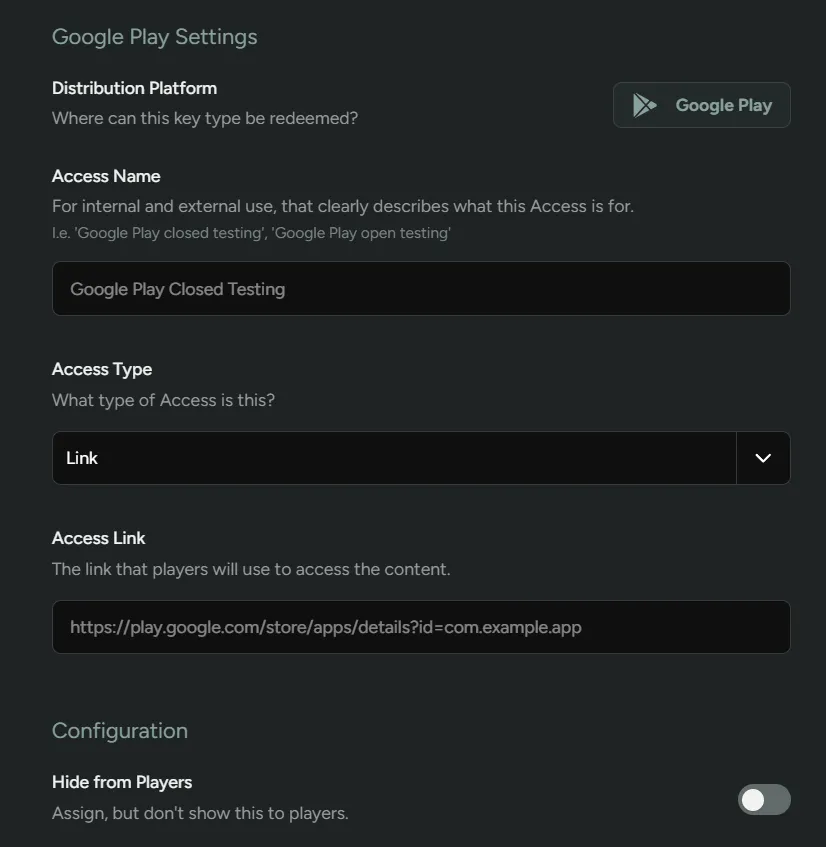
Google Play
Distribution Platform– The platform on which the key is distributed.Access Name- The name of the key type. This identifies the key type in your system and is displayed to players in their dashboard.Access Type
- Link - Add users to Google Play Console and provide access via link.
- Access Code - Generate codes that anyone can redeem. FirstLook has no control over user redemption.
Hide from Players- Toggle to hide the key from a players dashboard, but keep it assigned.
Link to Google Play Integration docs
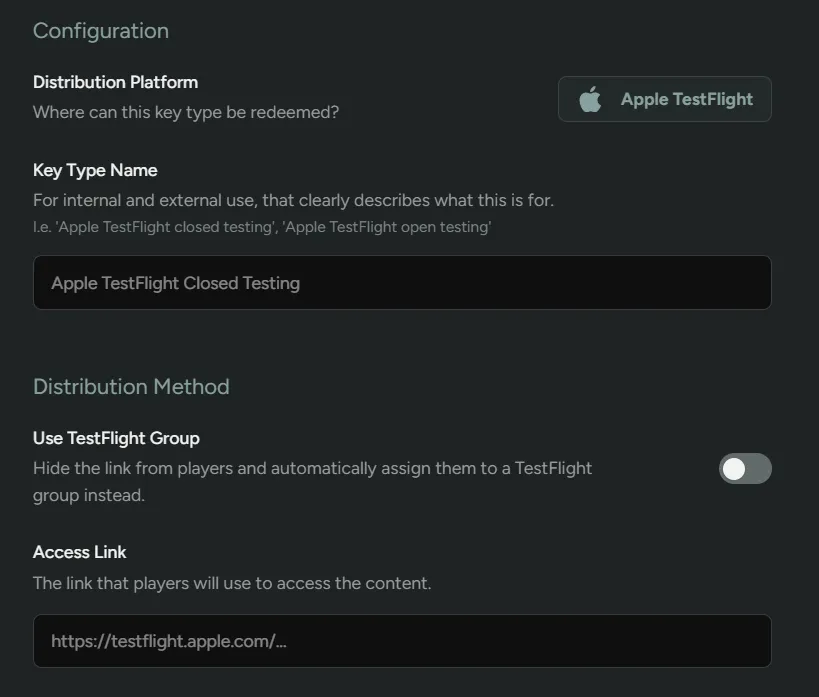
Apple TestFlight
Distribution Platform– The platform on which the key is distributed.Key Name– The name of the key type. This identifies the key type in your system and is displayed to players in their dashboard.Use TestFlight Group- Toggle on to hide the link from players and automatically assign them to a TestFlight group.
-
Assign TestFlight Group- Choose the TestFlight group to assign.
Access Link- The link that players will use to access the content.
Link to Apple Integration docs
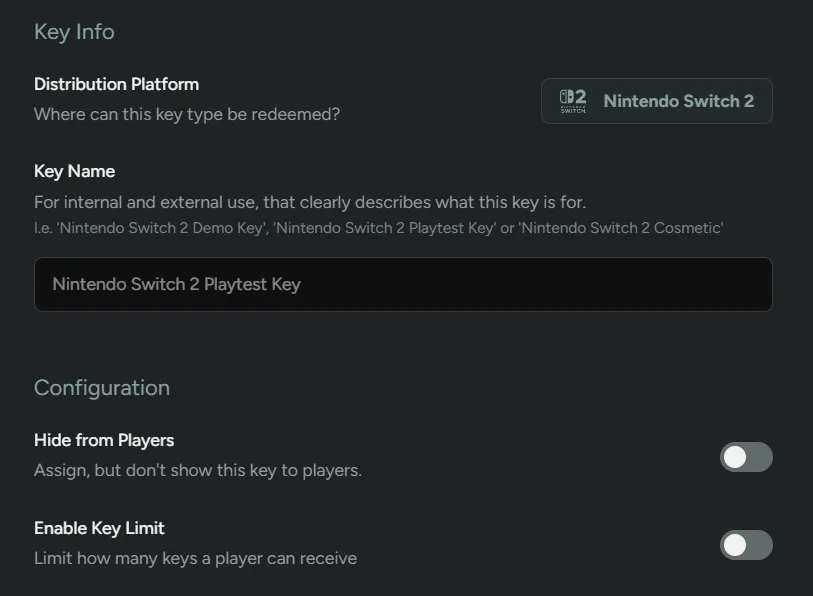
Nintendo Switch 2
Distribution Platform– The platform on which the key is distributed.Key Name– The name of the key type. This identifies the key type in your system and is displayed to players in their dashboard.Hide from Players- Toggle to hide the key from a players dashboard, but keep it assigned.Enable Key Limit- Set the maximum numbers of keys a player can receive.
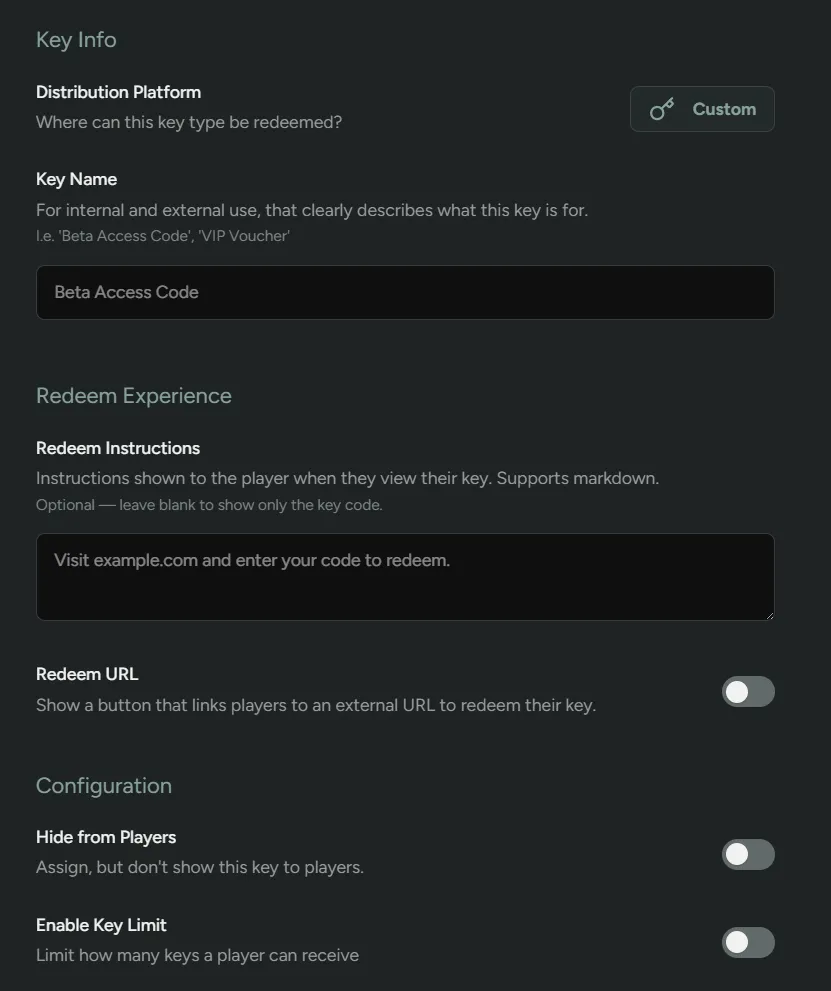
Custom Key
Distribution Platform– The platform on which the key is distributed.Key Name– The name of the key type. This identifies the key type in your system and is displayed to players in their dashboard.Redeem Instructions- Player facing instructions that are visible when redeeming the key. This field supports Markdown formatting. Leave blank to only show the key.Redeem URL- Add a custom URL which the player can use to redeem their key.Hide from Players- Toggle to hide the key from a players dashboard, but keep it assigned.Enable Key Limit- Set the maximum numbers of keys a player can receive.
Player Choice Keys
Section titled “Player Choice Keys”Player Choice Keys let you hand a player a single reward and let them decide which platform they want to play on. Instead of locking the player to one store, the key presents a picker — Steam, Xbox, PlayStation, Epic, and more — and swaps itself for a real platform key the moment the player chooses.
How it works
Section titled “How it works”A Player Choice Key is a token, not a key. On its own it grants nothing — it acts as a placeholder that points to a set of real platform key types you’ve already created.
- When a player redeems the token, they pick one of the platforms you’ve enabled.
- FirstLook consumes the token and assigns the player a real key from that platform’s key type.
- The choice is final: once a platform is claimed, the token is spent.
Because the token holds no keys of its own, you can assign it to an unlimited number of players. The actual supply limits live on the underlying platform key types it points to.
Before you start
Section titled “Before you start”A Player Choice Key references existing key types — it does not create them. Set up the platform key types you want to offer first, then build the token on top of them.
- Create a key type for each platform you plan to include (for example, a Steam key type, an Epic Games Store key type, a PlayStation key type). See Key Types above for how to add and configure each platform.
- Upload or connect keys for those platform key types so there’s supply available to assign.
You can only include a platform if a matching key type already exists for it. Some platforms (Epic, EA, Google Play, Apple TestFlight) also require that integration to be enabled for your game before they appear as options.
Setting up a Player Choice Key
Section titled “Setting up a Player Choice Key”-
Open the Keys & Access tab and go to Key Types.
-
Select New and choose Cross-Platform Token.
-
Give the token a Token Label — a clear name for internal and player-facing use, e.g.
Cross-Platform Playtest Key. This is the name players see when the key is assigned to them. -
Under Platform options, toggle on each platform you want to offer. For every platform you enable, select the specific key type players will receive if they choose it — the Steam key type for Steam, the PlayStation key type for PSN, and so on. Epic, EA, Google Play, and Apple TestFlight appear only if that integration is enabled for your game.
-
(Optional) Toggle Allow Region Selection to let players pick their region when redeeming. This applies only to PlayStation keys, and only for keys distributed through creator campaigns that support region selection.
-
Select Create Token (or Save Changes when editing).
Your Player Choice Key now appears alongside your other key types in Keys & Access. You can return to it at any time to add or remove platforms, or change which underlying key type each platform points to.
Assigning the key to players
Section titled “Assigning the key to players”A Player Choice Key is assigned exactly like any other key — through a reward, a Flow, player segmentation, a creator campaign, or by granting it manually from the Keys & Access tab. Once assigned, it sits in the player’s dashboard waiting to be redeemed.
The player experience
Section titled “The player experience”When a player has a Player Choice Key assigned, redemption is a guided, self-serve step on their dashboard:
- Open the reward. The player sees the token’s label on their dashboard and selects it to redeem.
- Choose a platform. They land on a picker headed “Which platform do you want to play on?” listing every platform you enabled.
- Connect the matching account (if needed). Each platform key requires the player’s account for that platform to be linked. If it isn’t, a Connect your [Platform] button appears; the player connects the account, then returns to claim.
- Select a region (PlayStation only). If you enabled Allow Region Selection and the player chooses PlayStation, they pick their region (Americas, Europe, Asia, Japan, or Korea) before claiming.
- Claim. FirstLook spends the token, assigns a real key from the chosen platform’s key type, and takes the player to that key’s redemption page.
After claiming, the token is marked redeemed and the player owns a standard platform key — there’s nothing different about it from that point on.
What players might run into
Section titled “What players might run into”| What the player sees | What it means |
|---|---|
| A platform marked Unavailable | There are no keys left in that platform’s key type, so it can’t be chosen. The player can pick a different platform. |
| Connect your [Platform] instead of Claim | The account for the selected platform isn’t linked yet. The player must connect it before they can claim. |
| ”There are no more keys available for this platform.” | The chosen platform ran out of supply between selection and claim. The player can choose another platform. |
| ”There are no more keys available for this platform in your region.” | Region selection is on and that region is out of keys. The player can try a different region or platform. |
Viewing Keys
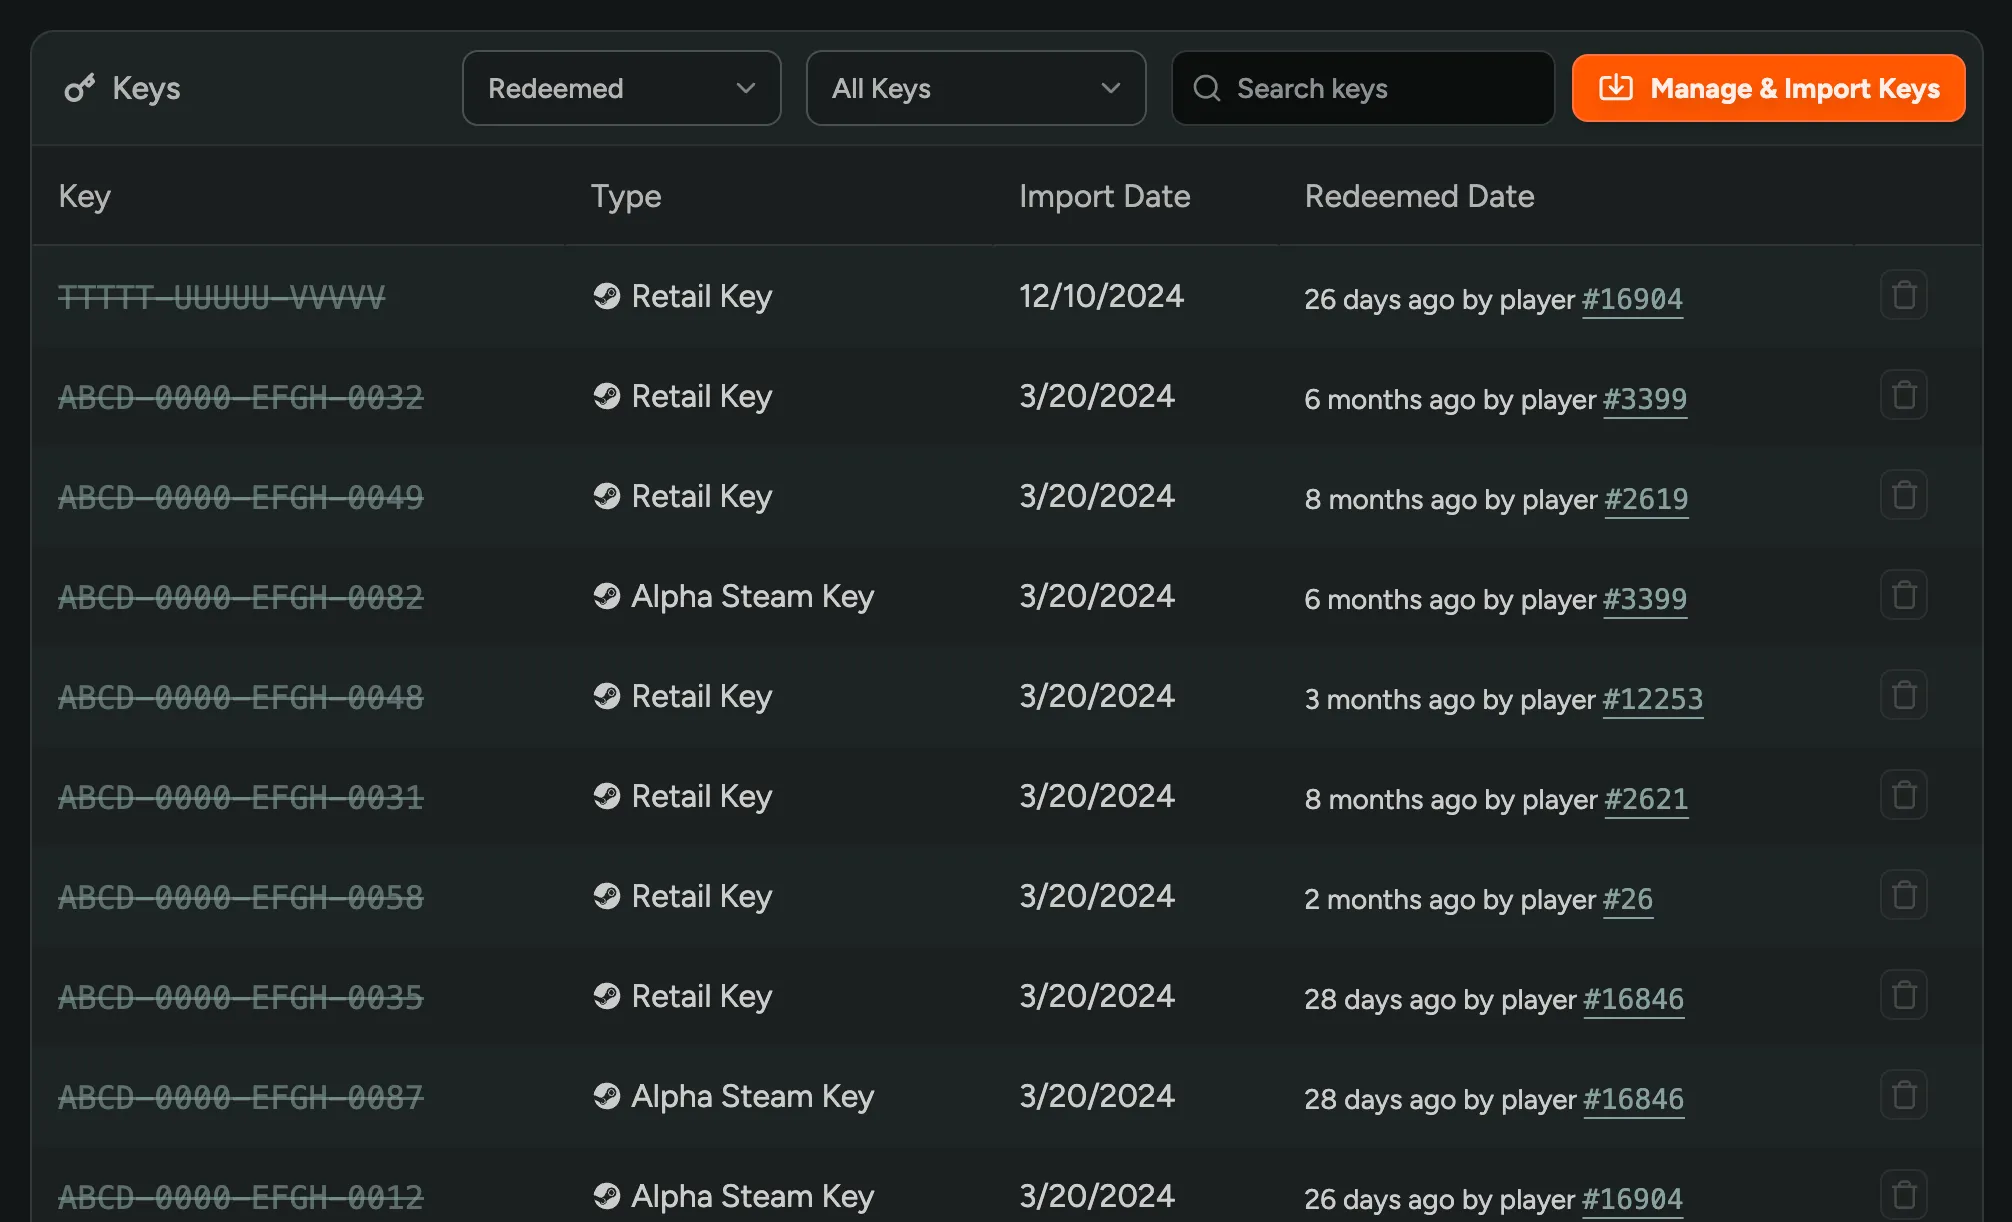
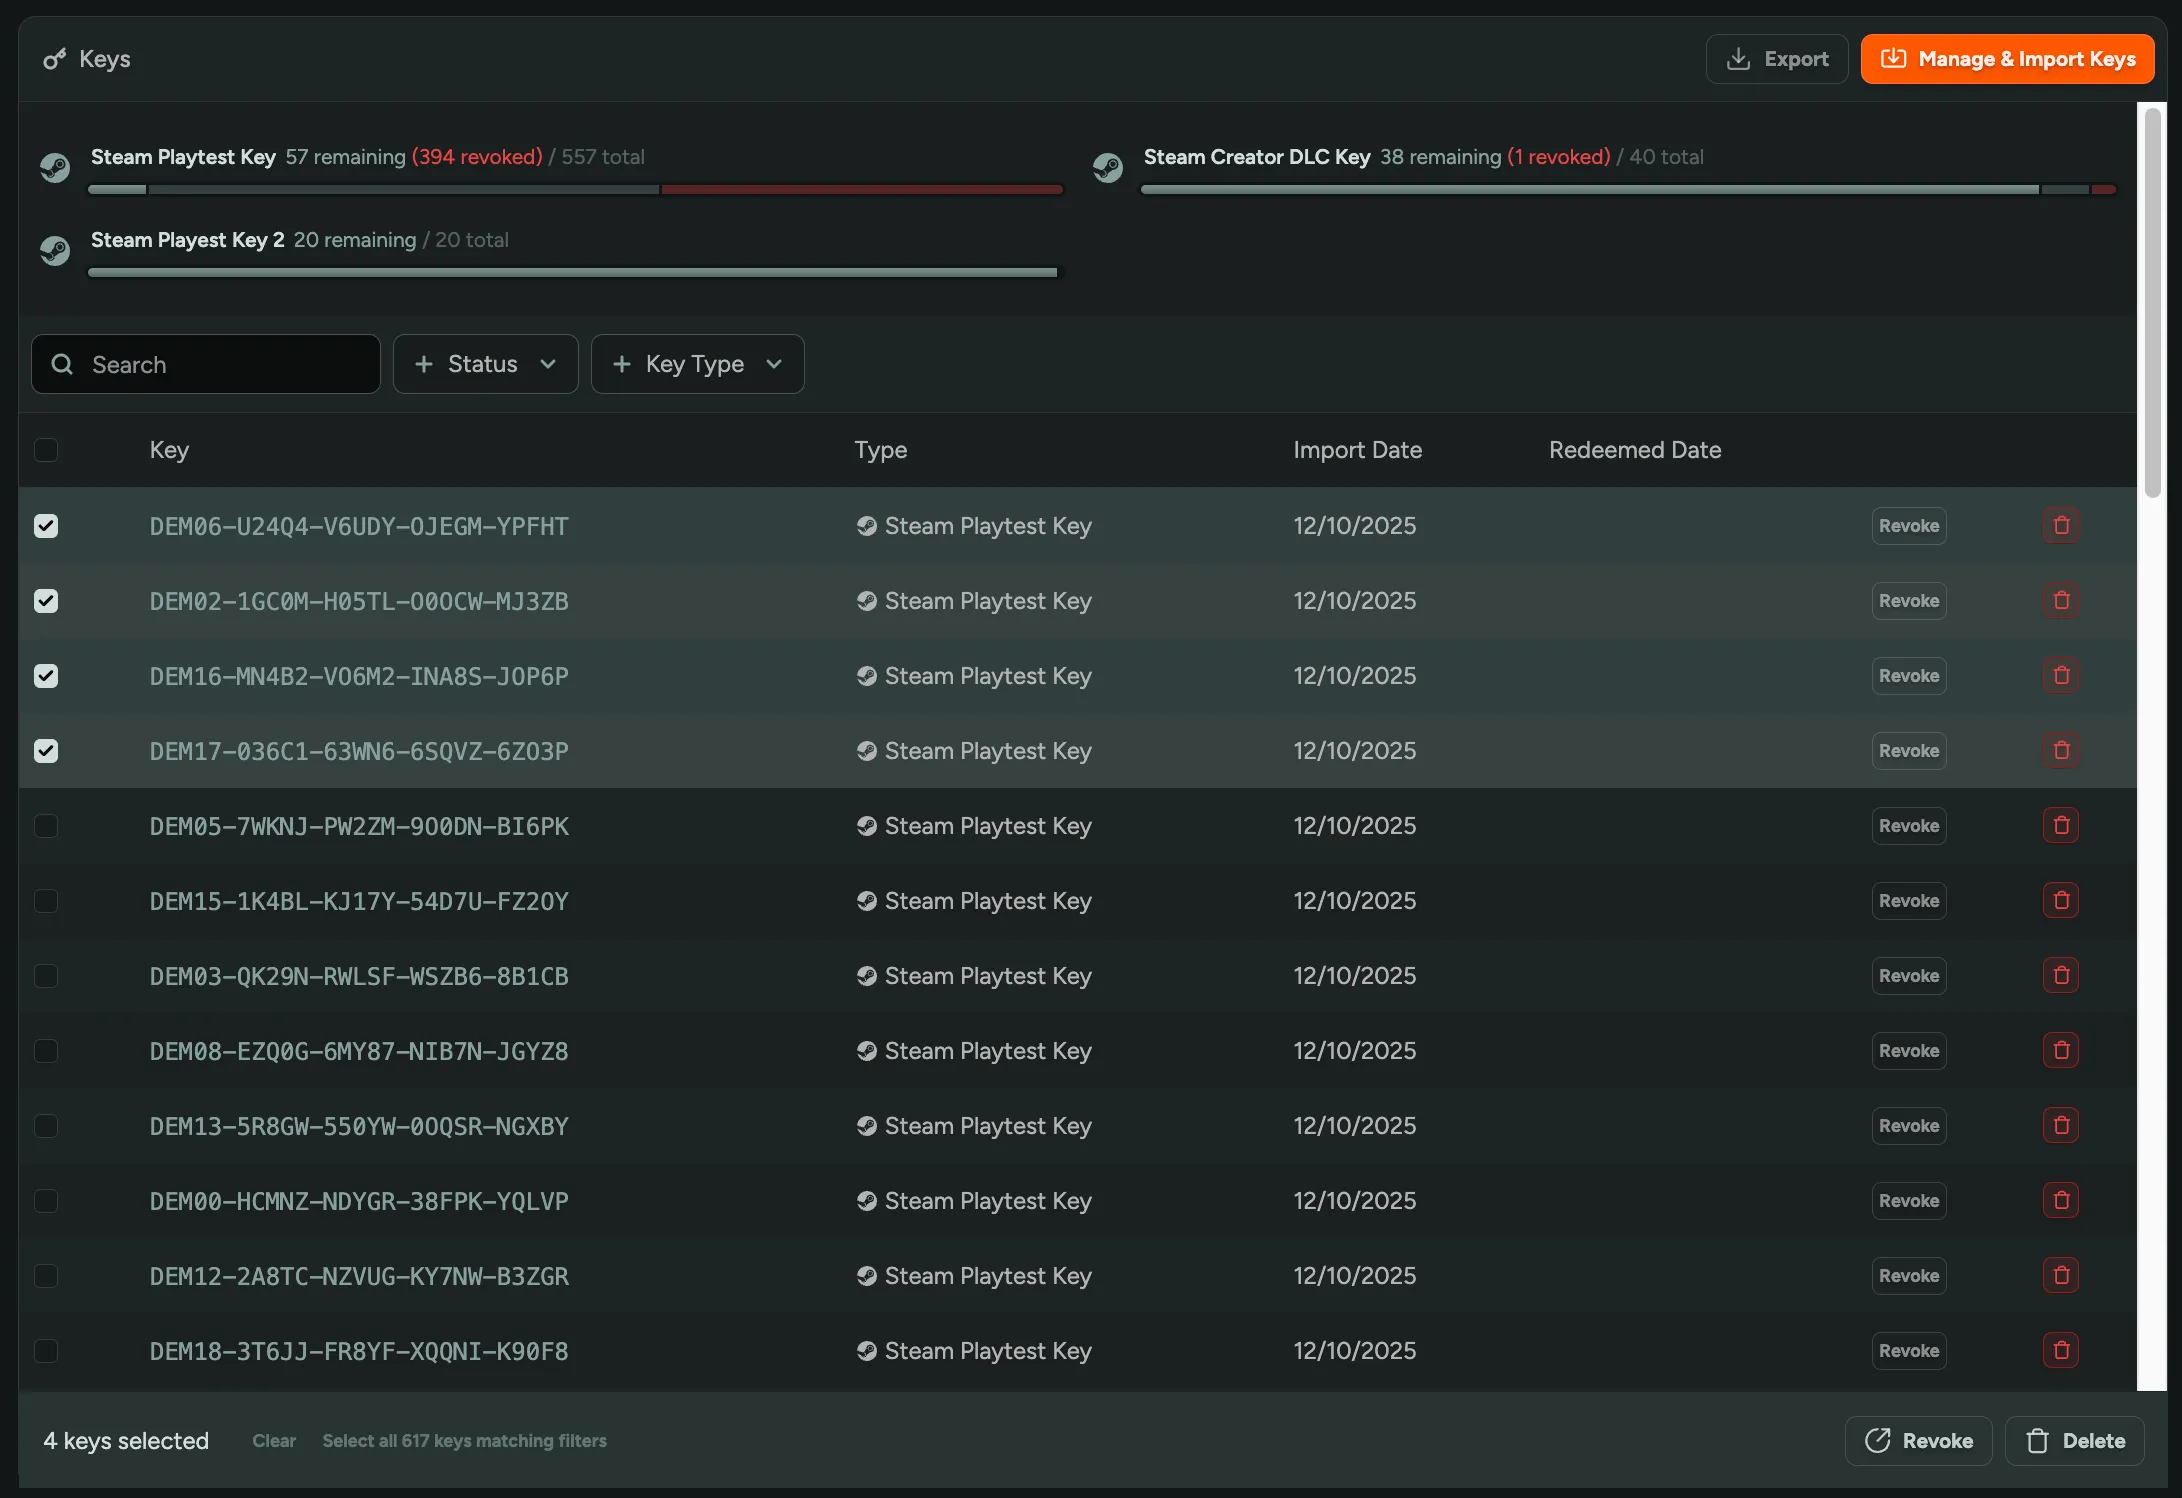
Section titled “Viewing Keys”In the ‘Keys & Access’ tab, you can browse all keys for your game and filter by key type, status (redeemed or not), and search by key. If a key is assigned to a player, you will see when it was assigned and the player who received it.
Revoking and Deleting Keys
Section titled “Revoking and Deleting Keys”If you want to remove keys from FirstLook, you can either select Revoke or Delete. This can be done either individually or in Bulk from the Keys tab.
Revoke - Revoke keys that have been assigned to a player.
Delete - Delete keys that have not yet been assigned.
Exporting Keys
Section titled “Exporting Keys”If you need to export a .txt list of your keys, this can be done by selecting Export in the top right hand corner of the Keys and Access tab. This is especially useful if you’re looking to import them directly into Steam for deletion.
Working at Scale
Section titled “Working at Scale”A few things to know when handling keys in large volumes:
- Large imports process in the background. The counts shown right after upload can look partial until processing completes — give it a few minutes. See What happens in the background.
- Key files are capped at 10 MB. Split very large files into multiple imports. See Limits & File Requirements.
- Removing keys in bulk. Revoking and deleting supports bulk selection from the Keys tab — see Revoking and Deleting Keys above. To remove keys from Steam itself, follow the key removal steps on the Steam Playtests page.