Creators
Creators help showcase your game and reach new audiences. With FirstLook, you can customize how creators sign up, review and accept applications, and see the content they produce.
Configure your Creator Program
Section titled “Configure your Creator Program”Set up a dedicated path for creators to apply and get approved.
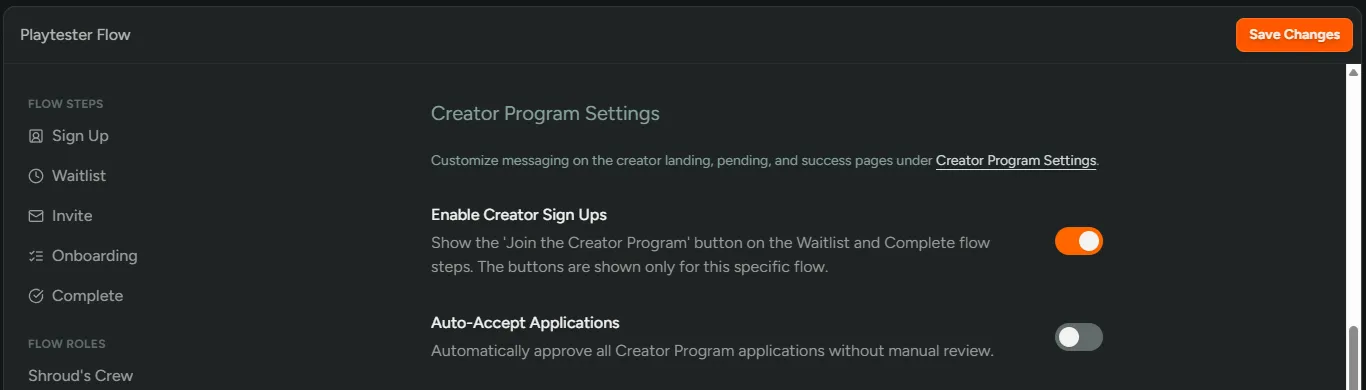
Enable sign ups
Section titled “Enable sign ups”- Go to Configuration → Flows and create or select a flow for creators.
- Open ‘Settings’ and scroll to ‘Creator Program Settings’.
- Toggle on ‘Enable Creator Sign Ups’.
- (Optional) Toggle on ‘Auto‑Accept Applications’. See Accept Creators into your Program.
- Click ‘Save Changes’.
Customize the experience
Section titled “Customize the experience”- Go to Configuration → Settings → Creator.
- In ‘Messaging’, customize the landing, pending, and success pages creators will see.
- In ‘Roles’, choose specific FirstLook and Discord roles to give creators.
- In ‘Emails’, customize the ‘Approval’ and ‘Enrollment’ emails.

Accept Creators into your Program
Section titled “Accept Creators into your Program”Review incoming creator applications and decide who to accept.
View your creators
Section titled “View your creators”Go to Dashboard → Creators to view all the creators in your program.
The status of the creator will indicate the following:
Applied- Has applied to join your Creator Program.Active- Has been accepted onto your Creator Program.Denied- Has been denied access to your Creator Program.Tracking- Manually added creators or those who have been moved from ‘Untracked’ to ‘Tracked’, will have a ‘Tracking’ status - see Tracking potential Creators.Untracked- Creators who have been automatically added to the platform via content filtering.

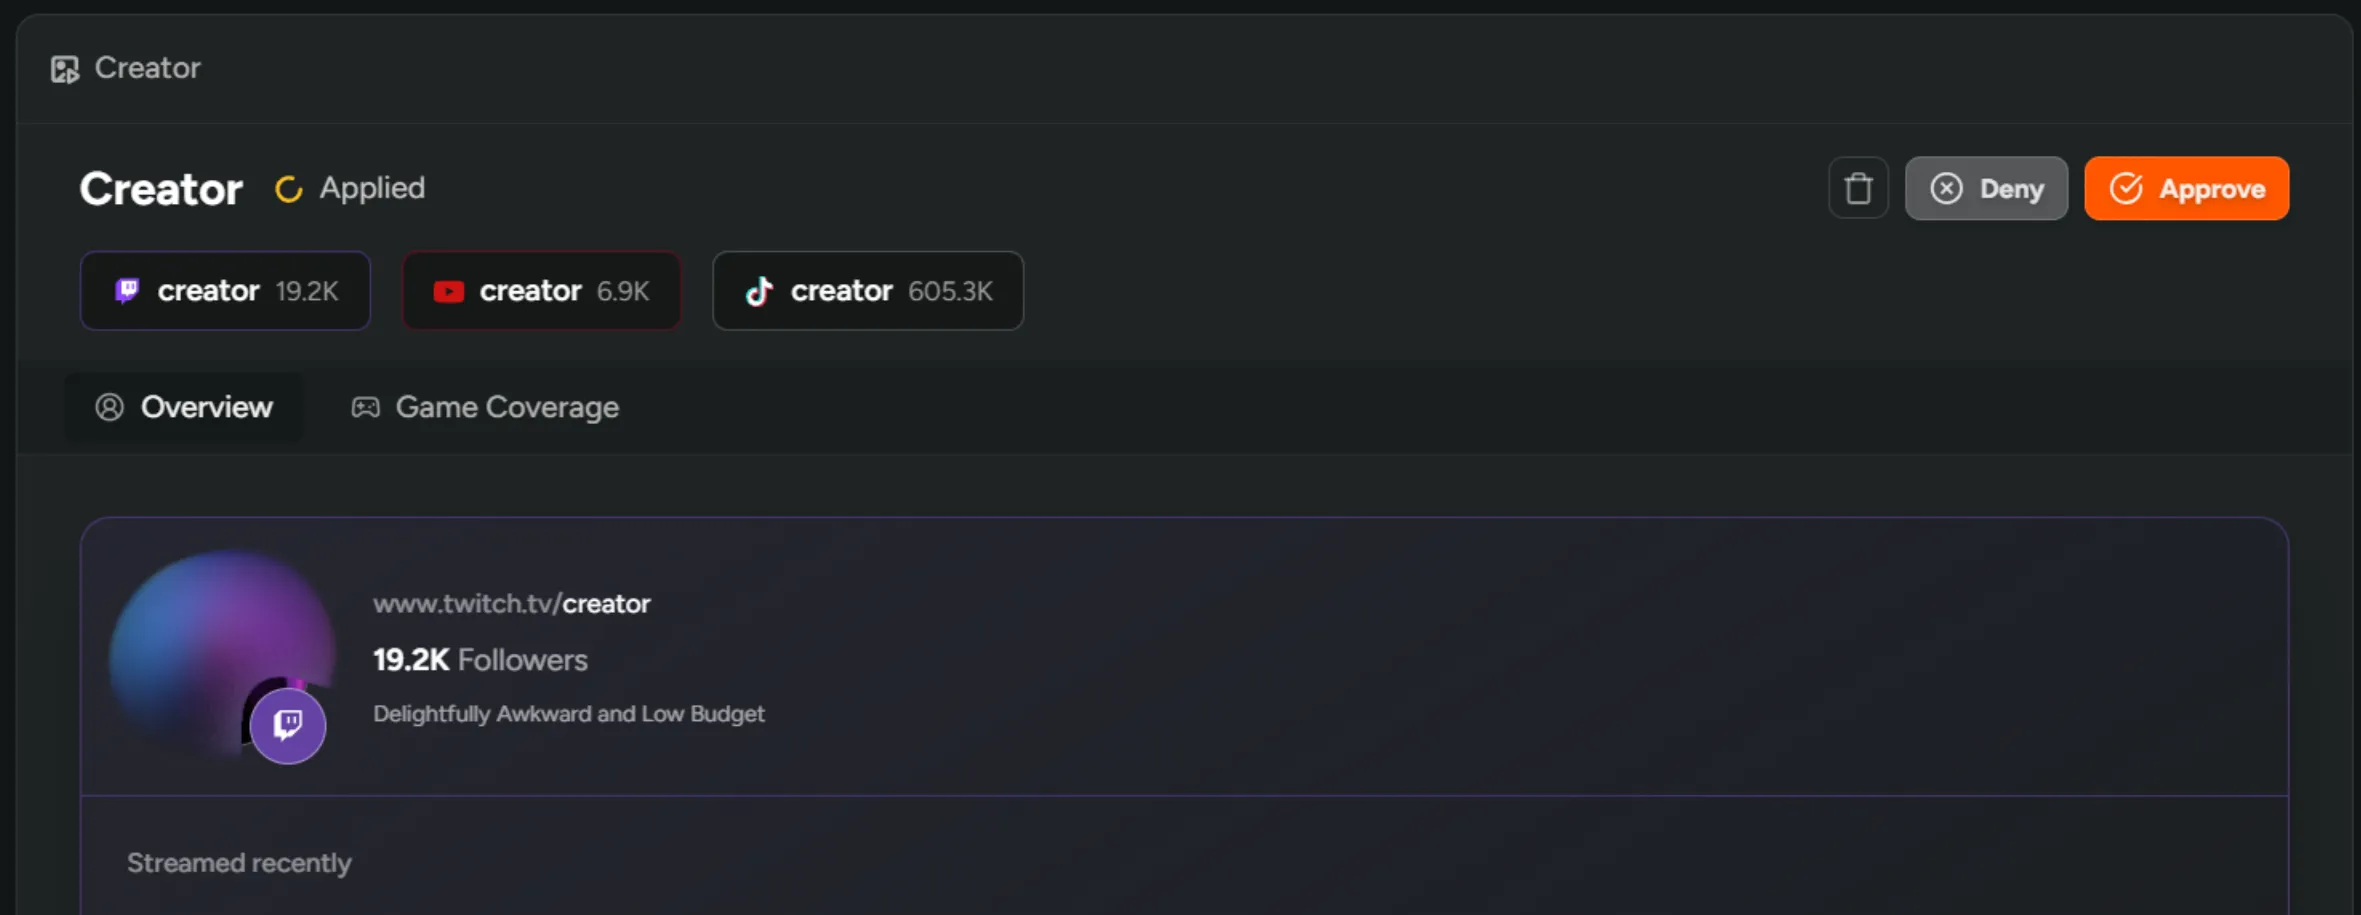
Accept or reject an application
Section titled “Accept or reject an application”- Select an ‘Applied’ creator from the table.
- Review their content and click ‘Approve’ or ‘Deny’.
- Approved creators will receive an email welcoming them to your program.
Enroll players as Creators
Section titled “Enroll players as Creators”Invite engaged playtesters to your creator program.
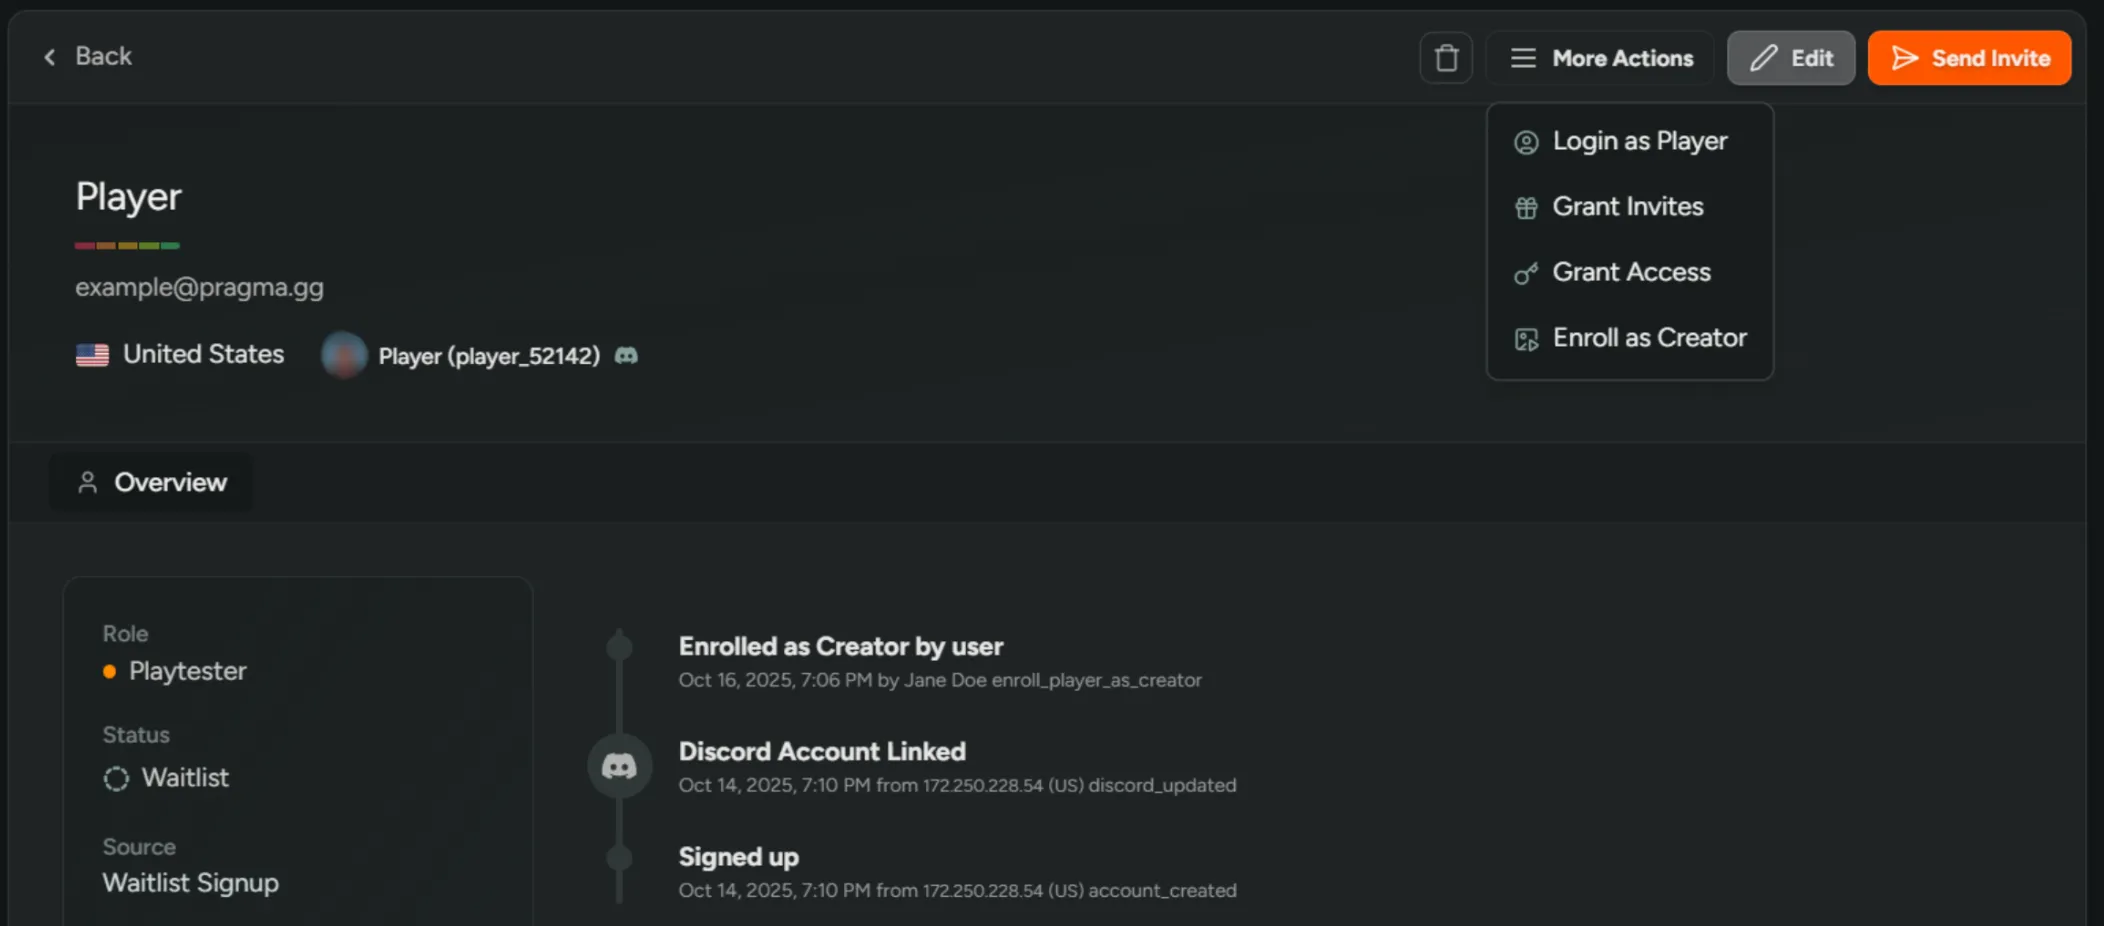
Enroll a player
Section titled “Enroll a player”- Open the player in Dashboard → Players.
- Click ‘More Actions’ → ‘Enroll as Creator’.
- The player will receive an email inviting them to join the program, with a link to your creator landing page.
Tracking potential Creators
Section titled “Tracking potential Creators”Keep a list of prospects you’d like to work with before they apply.
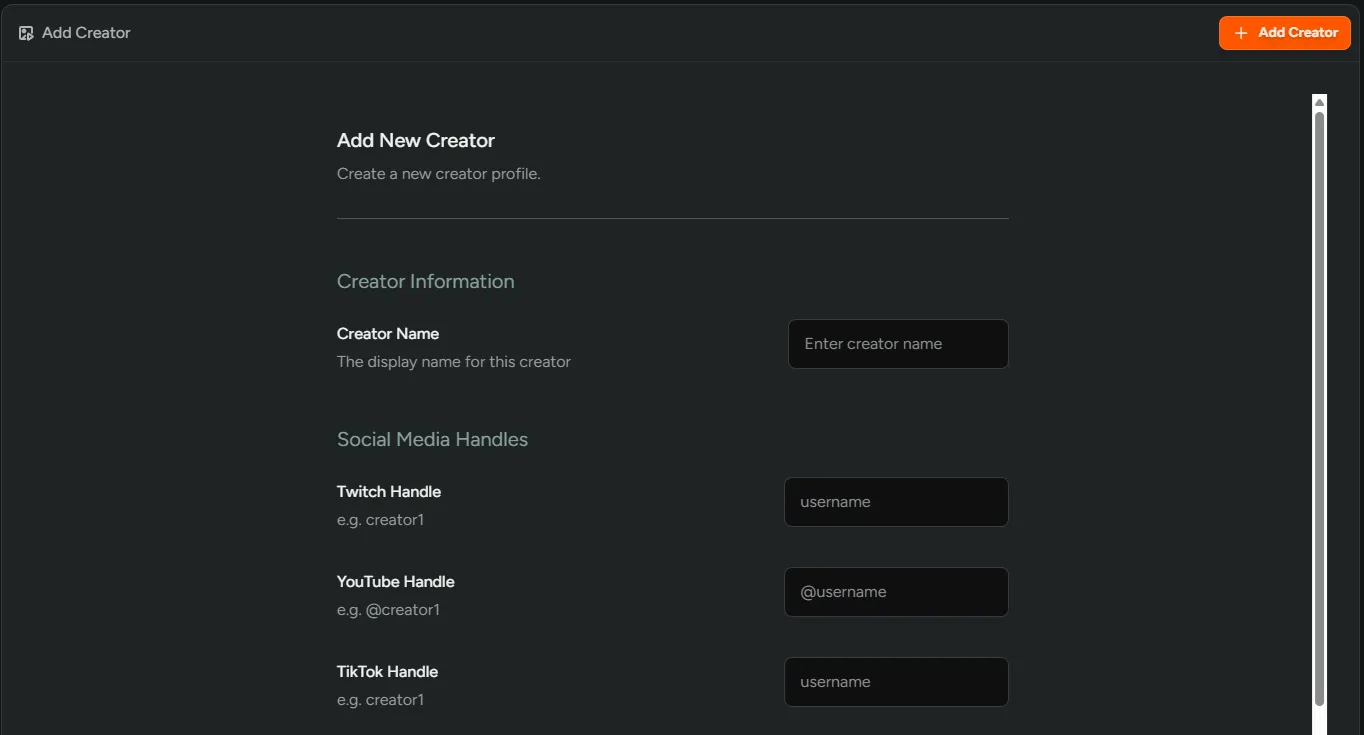
Manually add creators
Section titled “Manually add creators”- Go to Dashboard → Creators and click ‘Add Creator’.
- Enter their name and social handles.
- Click ‘Add Creator’ and they will appear as ‘Tracking’ in the table.
- Their content will populate within a few minutes.
Filter and track content
Section titled “Filter and track content”Navigate to Creators → Content to monitor and analyze content from all your creators.
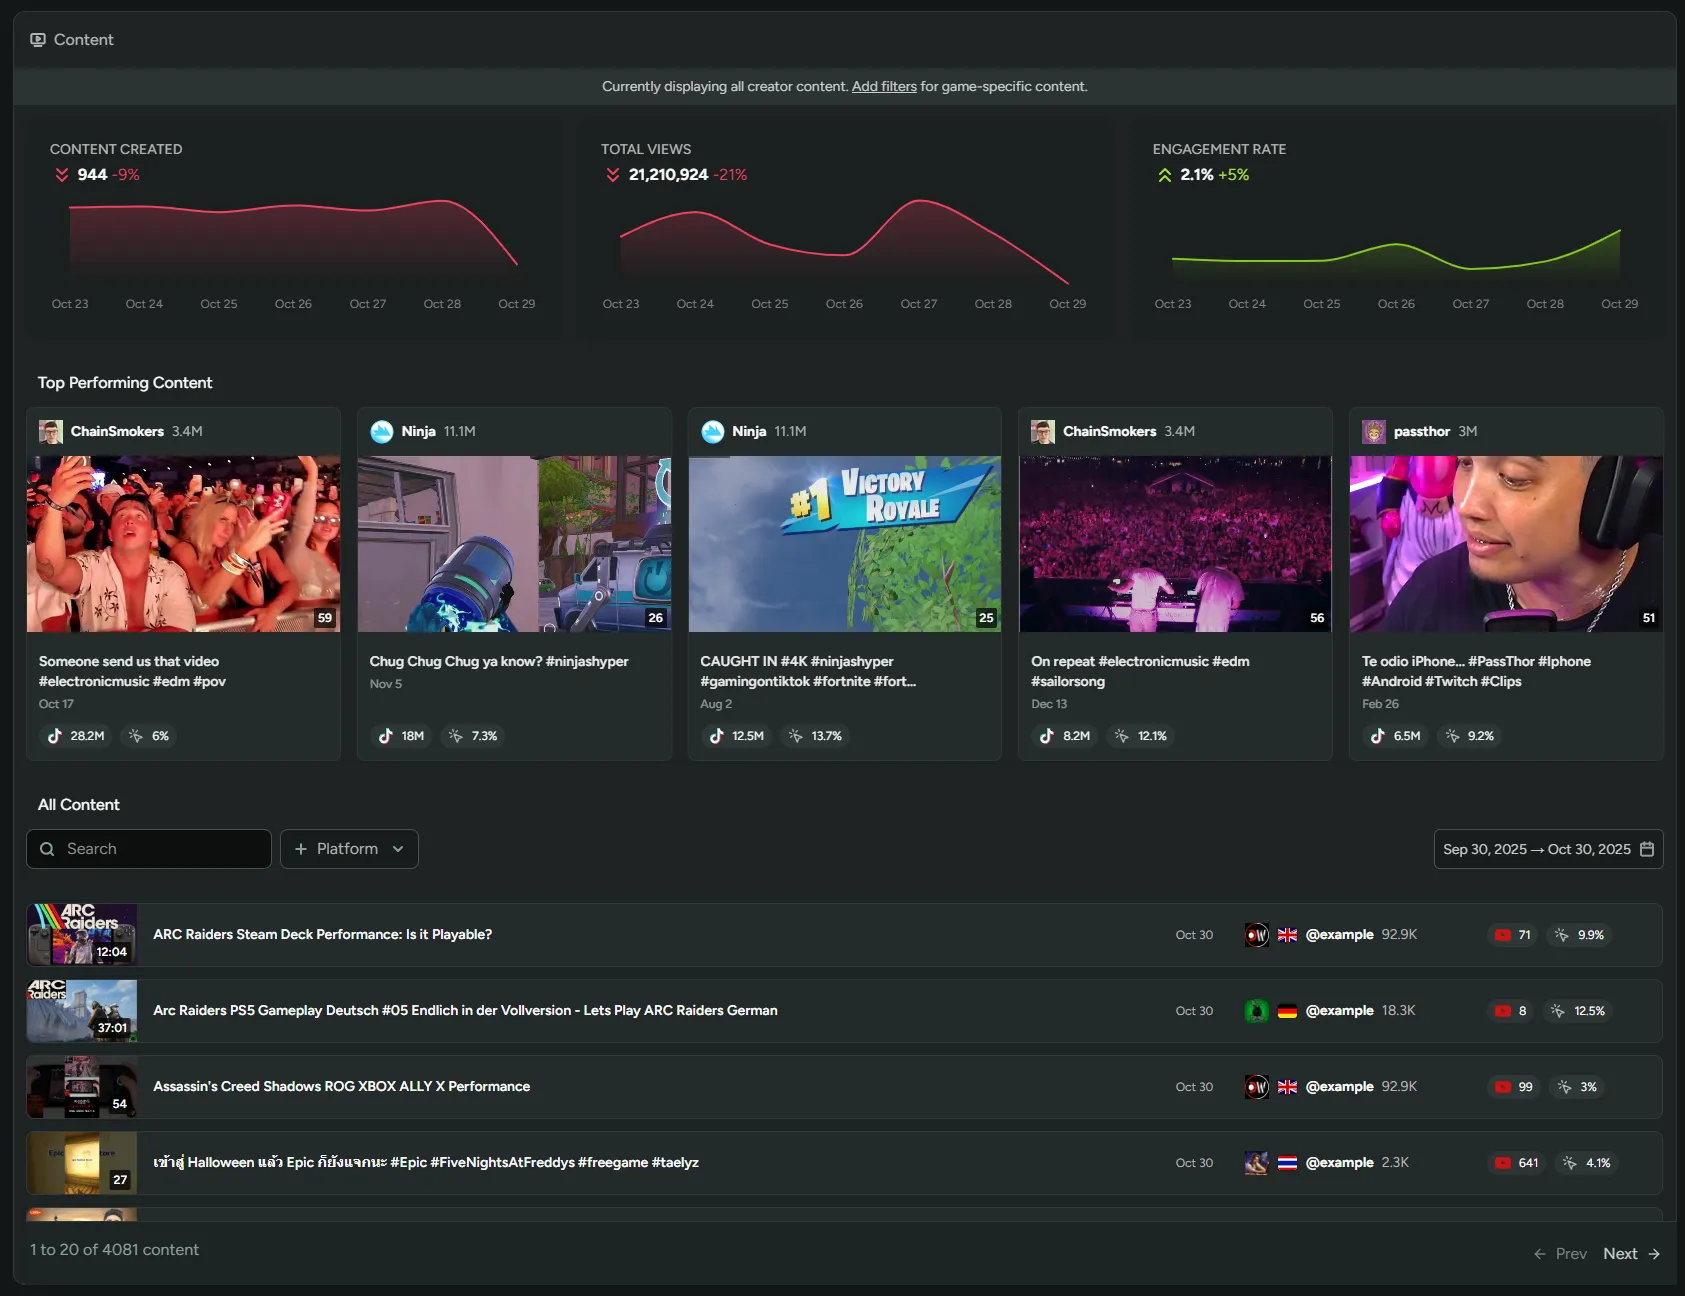
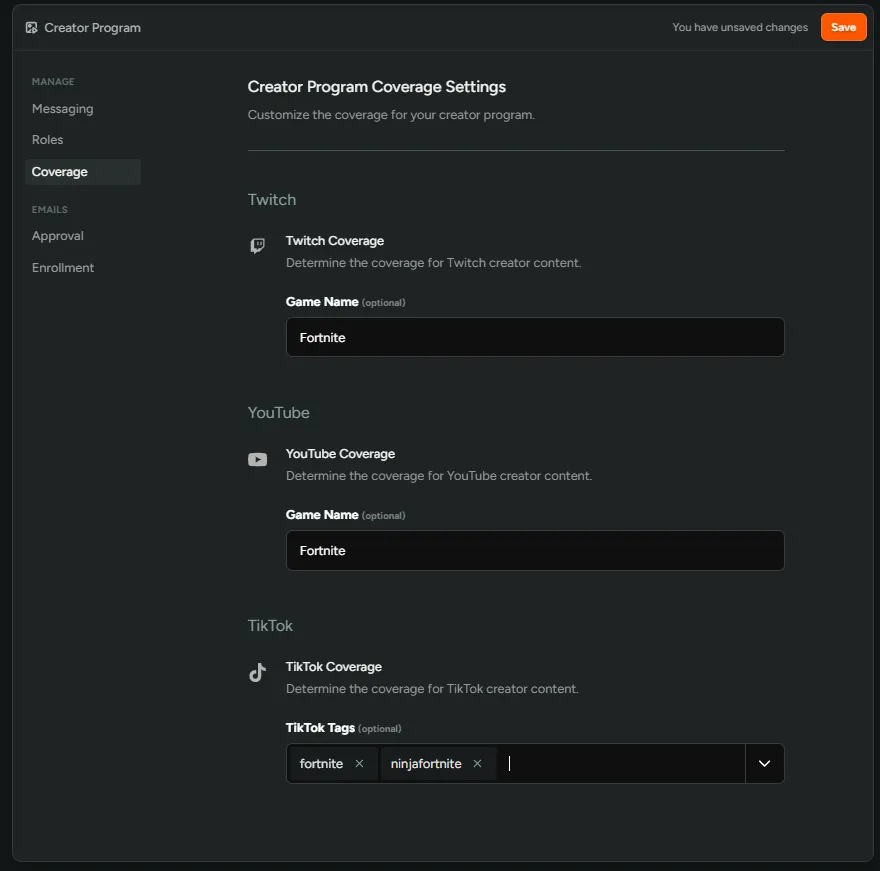
Apply content filters
Section titled “Apply content filters”Go to Configuration → Settings → Creator to add the games you want to filter content by.
Creator Campaigns
Section titled “Creator Campaigns”To create and manage your own campaigns, navigate to Creators → Campaigns. From here you’ll be able to activate your creator community around new content drops or special events, set goals for creators to hit, like number of uploads, views, or concurrent viewers, and reward them with in-game items, codes, or Discord roles that they can claim directly from their dashboard. You can also track all content created during a campaign, analyze performance, and identify your top-performing creators.
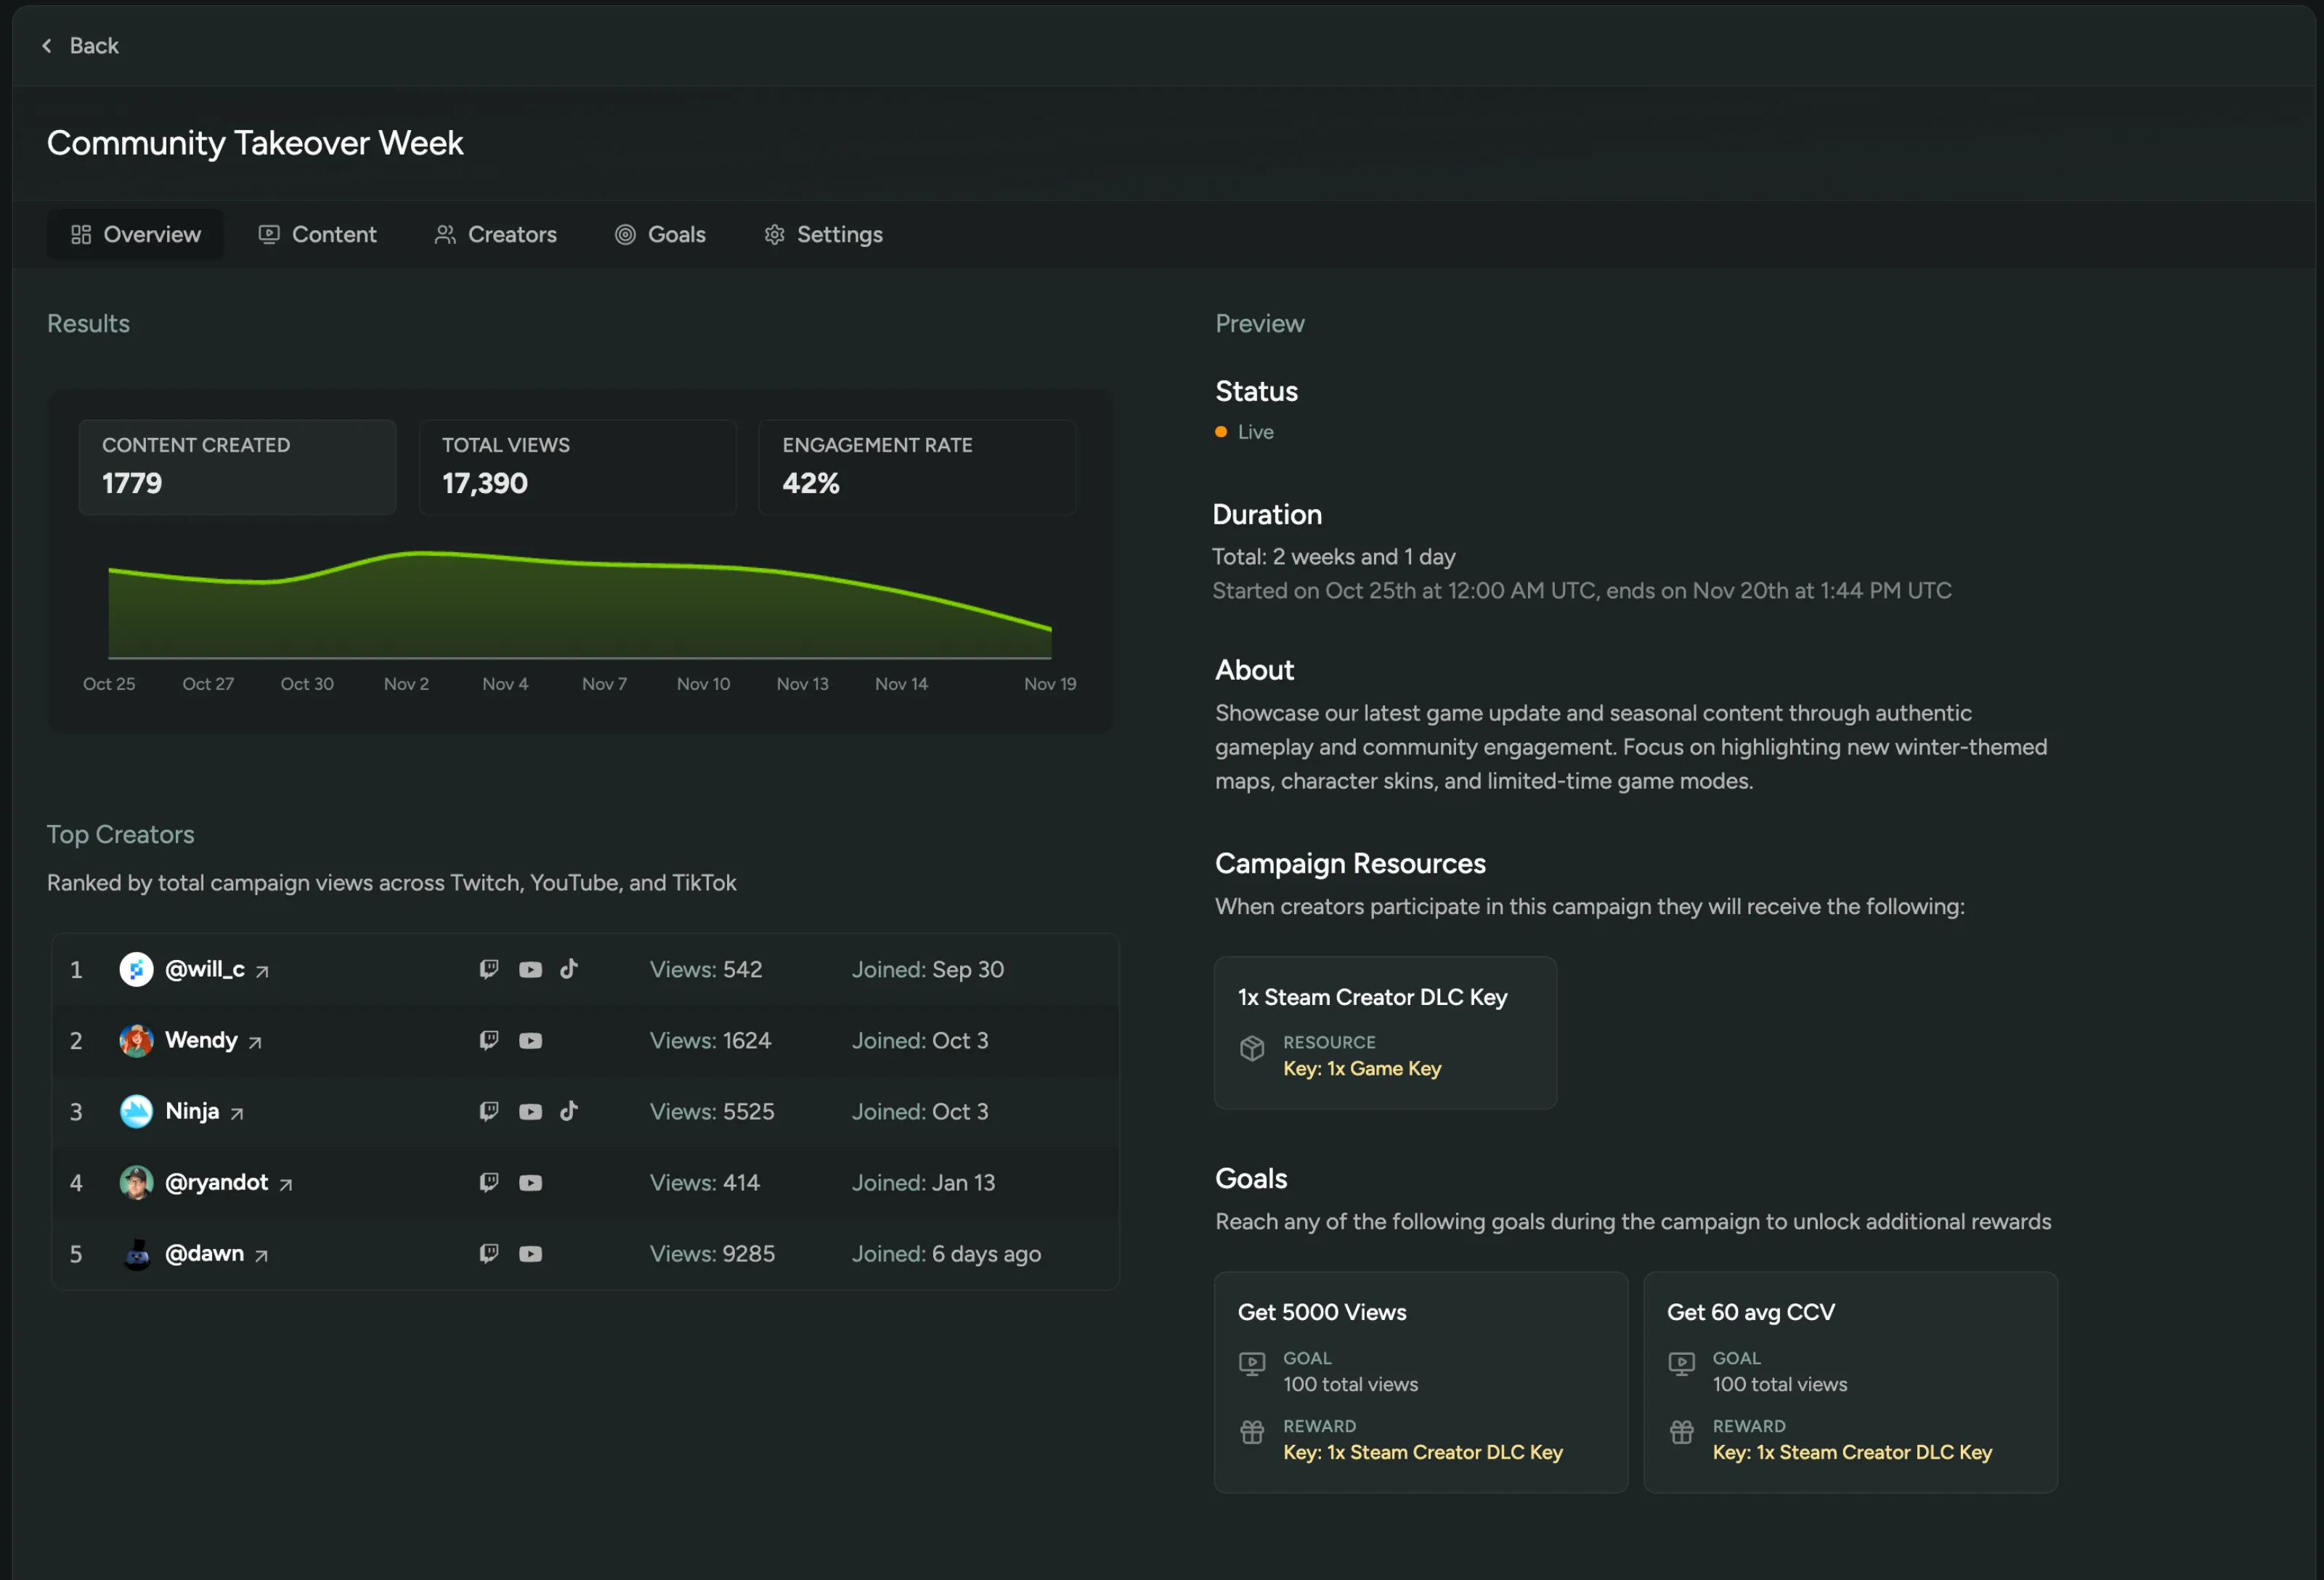
Content
Section titled “Content”Content that is specific to the campaign is surfaced here. This is configured in Settings and will only show content that fits the criteria you select and the timeframe of the campaign itself.
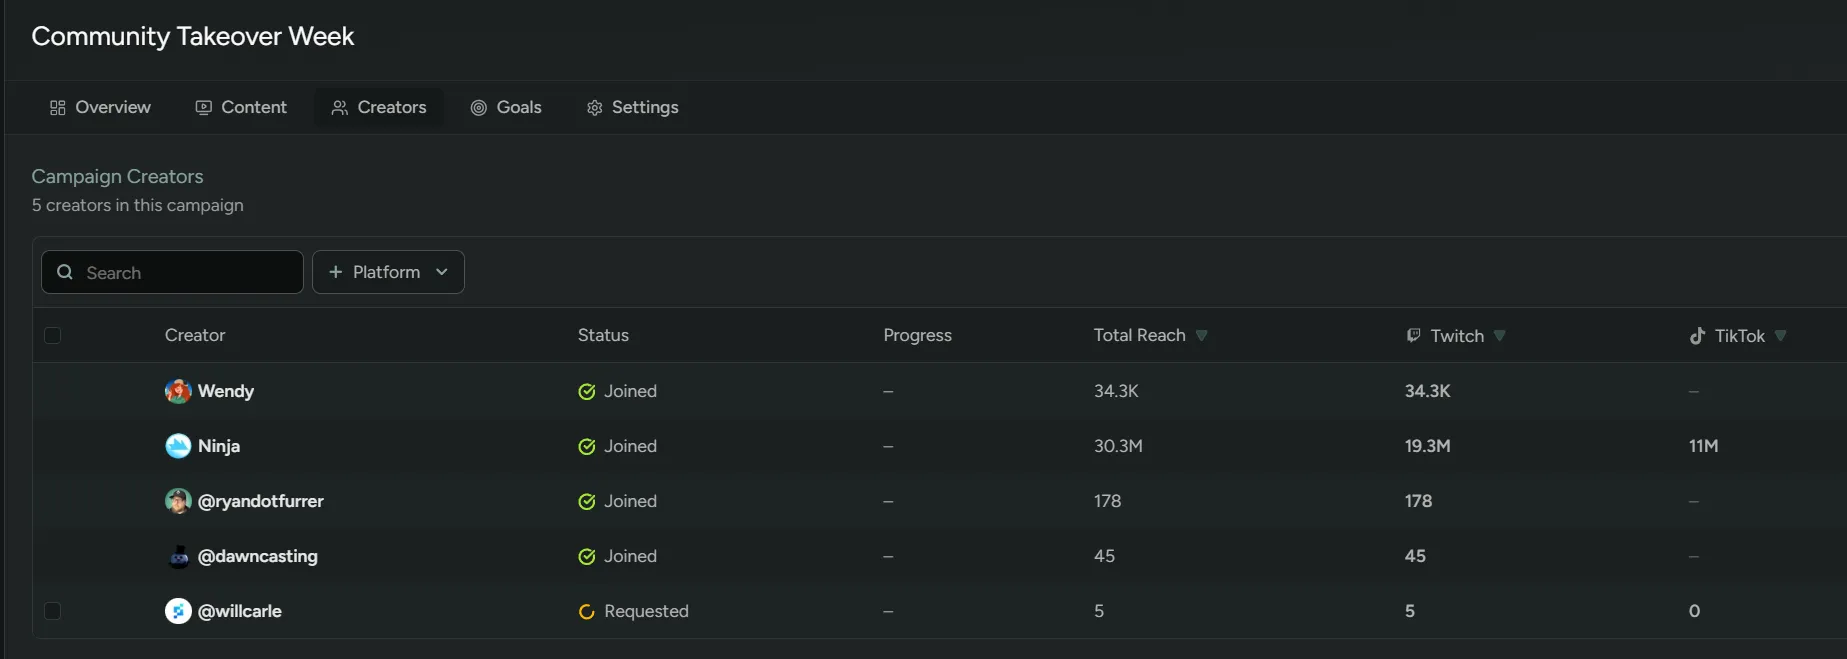
Creators
Section titled “Creators”Once a creator has been approved and accepted to your program, they’ll then be able to apply to the different campaigns you configure. This is controlled from the ‘Creators’ tab where you can either approve or deny their application. This gives you complete control over the access of individual campaigns.
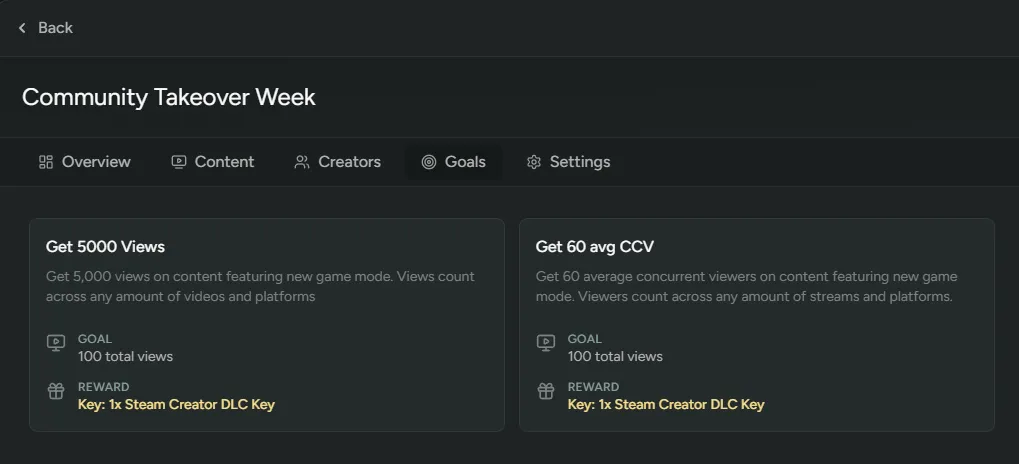
To set a new goal for your campaign, click ’+ New Goal’. You’ll be able to configure the following:
Goal Title - The name of your goal e.g. Get 5000 views.
Description - Description on how to achieve this goal.
Content Type - What type of content is being measured (VOD or Livestream).
Metric - What should be measured (Views, Duration, Number of uploads).
Measurement - How should the metric be calculated (1 or all content).
Views - The target creators must hit (e.g. 5000 views or 5 uploads).
Reward - The reward creators get for achieving this goal.
Full list of goals and rewards
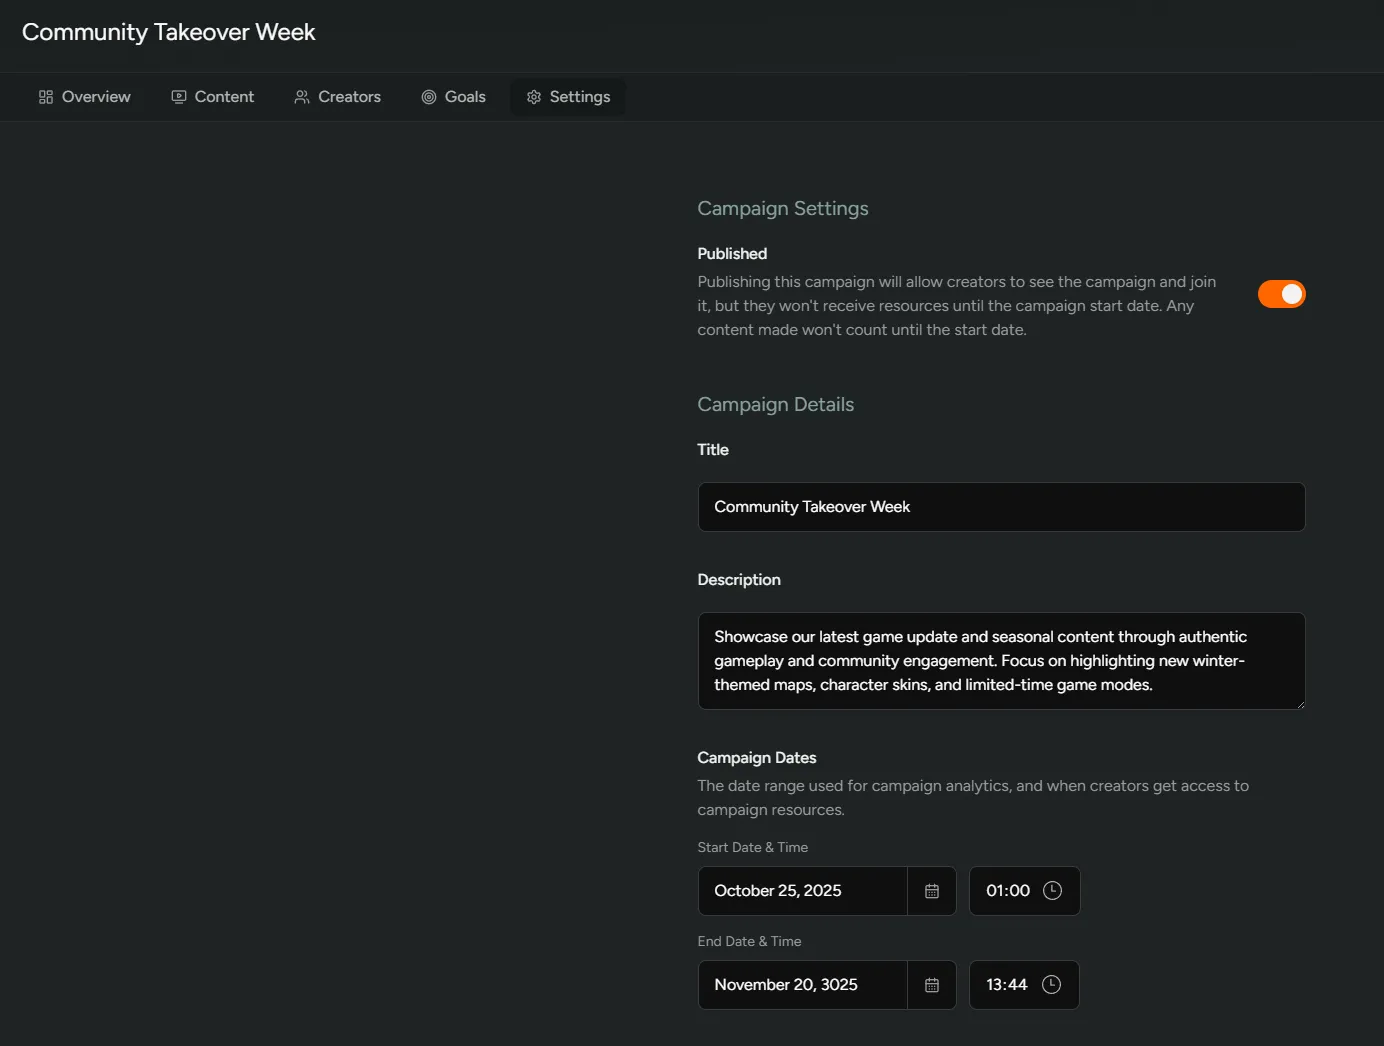
Settings
Section titled “Settings”General settings can be configured here.
Published - Toggle to allow creators to join the campaign. Creators won’t receive resources until the start date and content won’t count until the start date.
Title - Title of the campaign.
Description - Creator facing campaign description.
Campaign Dates - Start and end date for the campaign.
Content Eligibility - Configure what content is counted towards campaign rewards.
Campaign Resources - Rewards that are granted to creators upon the start date.