Flows and Roles
Flows and Roles are the backbone of playtesting in FirstLook. They define how a player signs-up and onboards to your playtest, as well as what access they ultimately receive. This guide walks you through every step of a Flow and how Roles shape that journey.
A Flow determines how a player progresses through each stage of the playtest experience — what they see, what they interact with, and when they can advance.
Players move forward sequentially through steps and can’t go back, so plan each stage carefully.

Sign-up
Section titled “Sign-up”The Sign-up step is where players first enter your playtest. It’s accessed via the unique Flow URL (e.g. https://demo.firstlook.gg/signup/playtester). If the Flow is marked as your Default Flow, players can also access it directly from your landing page.
- Account Linking - Players can sign-up using email, Discord, Steam, Epic, Playstation & Xbox. It is best to enable at least one provider beyond email (such as Discord) to help reduce spam. You have the ability to require any of these providers as part of the signup process.
- Additional account linking opportunities are available later in onboarding, but minimizing early friction often helps conversion.
- Custom Messaging - Toggle on custom messages or videos to excite potential testers about your game.
- Eligibility Requirements - This can be toggled to make players verify their age. If enabled, this will need to be filled out first before progressing to account linking.
- Sign Up Form - Add pre-screening questions to gather player info (e.g. system specs, favorite genres, playtime). These answers can later be filtered in the Players tab via +Add Filter → Questions. You can choose between a lightweight form for easy sign-up or a detailed one for deeper segmentation - both approaches work depending on your goals.
Waitlist
Section titled “Waitlist”After signing up, players are added to the Waitlist. They’ll stay here until invited, so this is a good opportunity to thank them and share next steps.
- Messaging - Control what messaging they see on their dashboard.
- Call To Actions - Direct players to:
- Join your Discord server
- Wishlist your game on platforms like Steam, Xbox, or PlayStation
- If you want to build your Discord community early, enable
Automatically add players if they connected their Discord Account, and optionally assign roles automatically.
- Refer a Friend - Let players share a referral link with friends. Referrals appear in the Players tab, so you can track who’s driving new sign-ups. It is important to note that this will direct referrals to sign-up.
- Referral Gamification - Toggle to gamify referrals. You’ll be able to set the goal, the reward for hitting that goal as well as a reward message.
Invite
Section titled “Invite”When you’re ready to invite players, the Invite step controls what they see and receive after being invited to a playtest.
- Messaging - Customize what the invited player sees in their dashboard.
- Invite Email - Enabling will let you customize the email that is sent upon invite. If this is turned off, a default email will be sent. We strongly recommend you turn this on and send a custom email so that you can control what’s being sent.
Onboarding
Section titled “Onboarding”Once a player accepts their invite they move onto the onboarding phase. Here, you are able to request other account providers or request additional information.
- Ask for (real) name - You can this on or off to control whether players are required to add their first and last name. We recommend keeping this on so you’re able to personally address players in the future.
- Ask for country of residence - We automatically populate a players country of residence however, if you’d like to ask for this to be entered manually, please toggle off.
- Account Linking - Like during the sign-up stage, you’ll be able to ask players to connect further social accounts and toggle whether they are required or not. If you’re playtesting on Steam, we highly recommend asking players to connect their Steam accounts so you can track playtime and wishlist status.
- Onboarding Form - Reuse or expand on your Sign-up questions (previous answers will pre-fill automatically).
Complete
Section titled “Complete”Players have now been onboarded to your playtest. Congrats! During this stage you’ll be able to configure further messaging and add more call to actions.
- Messaging - Similar to the other steps, you can customize what the player will see in their FirstLook dashboard once they’re onboarded.
- Call to Actions - This is your last opportunity to ask players to join your Discord server (if you haven’t already) and wishlist your game on various platforms.
Flow Roles
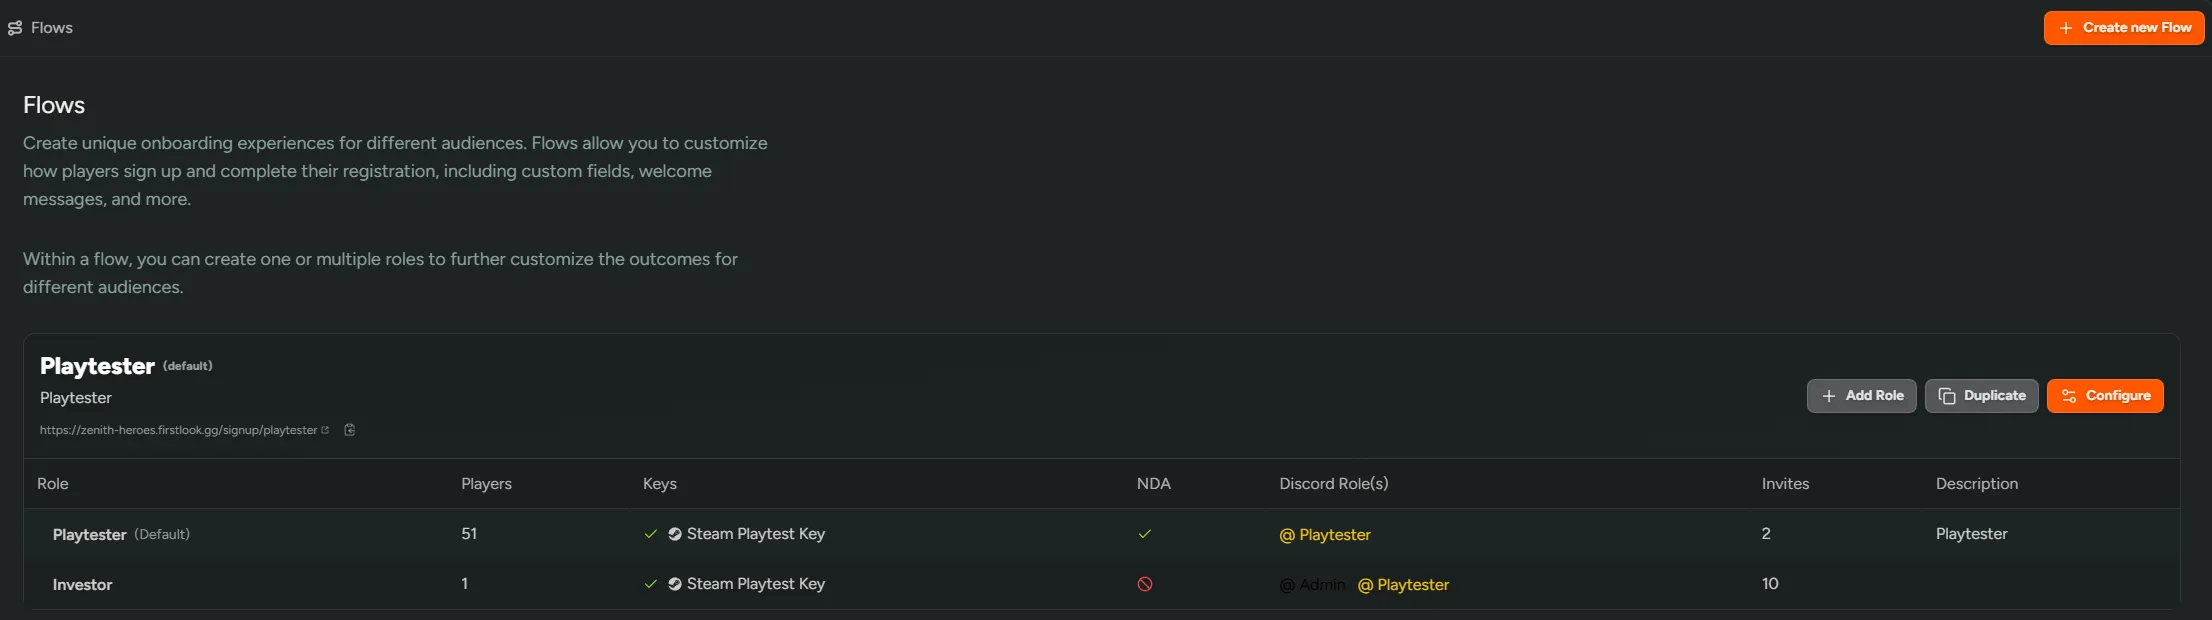
Section titled “Flow Roles”Flow Roles (or simply “Roles”) determine what a player can do once they have onboarded. Each Flow can include multiple Roles to handle different access levels or requirements.
- Requires NDA - You can toggle whether players will need to sign an NDA during onboarding. As an example, you may have investors playtesting your game and do not need to require an NDA. In that case, you can create a new Role by clicking
+Add Roleand toggling this setting off. Now when you invite a player with that particular role, they’ll go through the flow like everyone else, but they won’t have to sign an NDA. - Keys and Access - Select the keys you wish to grant once a player onboards.
- Discord Roles - Grant Discord roles once a player onboards.
- Invites - Allow Players to invite friends directly. This can be capped to limit the number of invites they can grant. Additionally, you can also assign a specific role to those who have been invited.

Settings
Section titled “Settings”There are some additional settings that are potentially useful when setting up your flows.
- Slug - You can change the unique identifier contained with the URL used for signing up e.g. if you’re slug is set to
playtesterthe URL would behttps://demo.firstlook.gg/playtester - Language - You can change the language of your flow. We currently support:
- English
- Español
- Français
- 日本語 (Japanese)
- 한국어 (Korean)
- 简体中文 (Simplified Chinese)
- Delete Flow - Default flows cannot be deleted. If you need to delete a flow which isn’t the default, this is where you can do it.